Learning how to install Graco 360 car seat rear facing correctly is one of the most important safety steps you’ll take as a parent. I’ve helped countless families install convertible car seats, and I can tell you this: small installation mistakes can dramatically reduce protection in a crash. The Graco 360 lineup—whether you have the Turn2Me, Extend2Fit 360, or SlimFit 360—offers excellent safety features, but those features only work if the seat is installed properly.
In this guide, I’ll walk you through exactly how to install Graco 360 car seat rear facing, step by step. Clear. Practical. No fluff.
Why Rear-Facing Matters More Than Most Parents Realize
Rear-facing isn’t just a recommendation. It’s a physics decision.
In a frontal collision—the most common serious crash—everything in the vehicle moves toward the point of impact. A rear-facing seat cradles your child’s head, neck, and spine, distributing crash forces across the entire shell. A forward-facing child absorbs that force in the neck. The difference is enormous.
The American Academy of Pediatrics recommends keeping children rear-facing as long as possible, up to the maximum height or weight allowed by the car seat. Most Graco 360 models allow rear-facing up to 40 pounds, sometimes higher depending on the version. Always check the label on your specific seat.
When I teach parents how to install Graco 360 car seat rear facing, I always emphasize this: your goal is not just installation. It’s optimal protection.
Before You Start: Set Yourself Up for Success
Preparation makes installation smoother and safer.
Here’s what I always gather first:
- Your Graco 360 car seat
- Your vehicle owner’s manual
- The Graco manual
- A small towel or pool noodle (only if permitted for leveling)
- Good lighting
Next, choose your seating position. The back seat is mandatory. The center position can be safest statistically, but only if your vehicle allows proper installation there. Many vehicles have easier access to LATCH anchors in the outboard seats.
I personally prioritize whichever position allows the tightest installation. That’s what matters most.
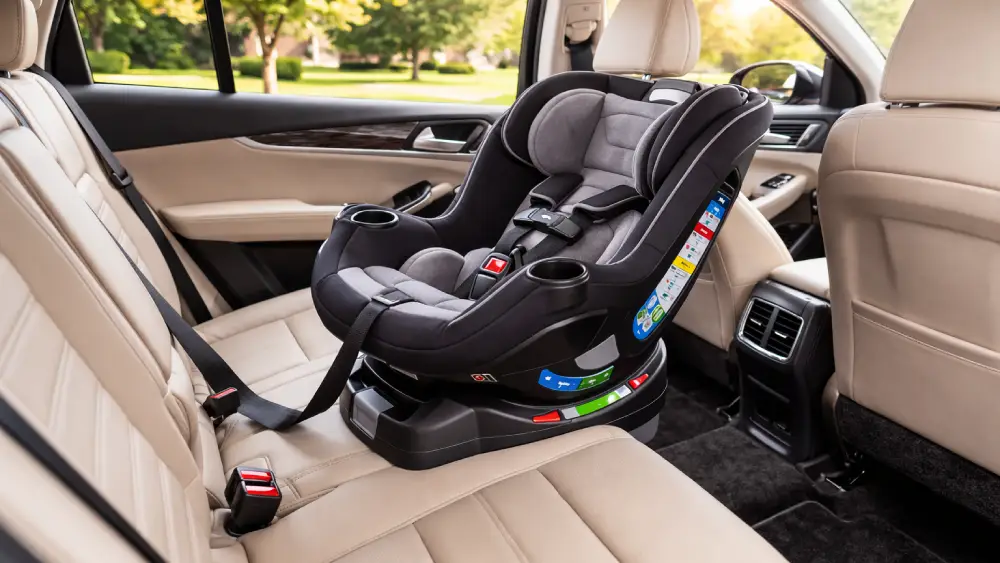
Step 1: Configure the Seat for Rear-Facing Mode
Before attaching anything, confirm the seat is set to rear-facing mode.
The Graco 360 rotates, which makes access easier. Rotate it toward the door so you can see what you’re doing. This feature doesn’t change installation mechanics, but it does improve ergonomics.
Next, adjust the recline.
Rear-facing seats must be installed at the correct angle to protect the airway and manage crash forces. Your Graco 360 has a bubble level or indicator on the side. Newborns require a deeper recline. Older babies with head control can sit more upright within the allowed range.
If the bubble isn’t in range, adjust the recline foot. Some vehicles have sloped seats, and that’s where a tightly rolled towel may help—if your manual permits it.
When parents ask me how to install Graco 360 car seat rear facing correctly, I tell them this: recline angle is not optional. It’s critical.
Step 2: Choose LATCH or Seat Belt — Not Both
You’ll install the Graco 360 using either:
- LATCH (Lower Anchors and Tethers for Children)
- The vehicle seat belt
Never use both unless the manual explicitly says you can. Most Graco 360 models require choosing one method.
When to Use LATCH
LATCH is convenient and often simpler. However, it has weight limits. Once your child reaches the combined LATCH weight limit (child weight + seat weight), you must switch to seat belt installation.
Check both your car seat manual and vehicle manual for those limits.
When to Use Seat Belt
Seat belt installation is just as safe when done correctly. In fact, I often prefer it because it avoids LATCH weight restrictions and works in nearly every seating position.
If you’re unsure, choose the method that gives you the tightest install.
Step 3: Installing with LATCH (Detailed Walkthrough)
If you’re using LATCH, follow these steps carefully.
- Locate the lower anchors in your vehicle seat crease. They’re usually marked with small symbols.
- Attach the Graco 360 LATCH connectors to the anchors. Listen for a click.
- Ensure the strap isn’t twisted. Twists weaken performance.
- Press down firmly into the car seat using your hand or knee.
- Pull the LATCH strap to tighten.
This is where most people stop too soon.
You want less than one inch of movement at the belt path. Grab the seat near where the LATCH strap runs through. Push side to side. Pull front to back.
If it moves more than one inch, tighten again. Use body weight. I sometimes kneel into the seat while pulling the strap straight across.
Recheck the recline indicator once tightened. Adjust if necessary.
That’s how to install Graco 360 car seat rear facing using LATCH the right way.
Step 4: Installing with the Seat Belt (Highly Reliable Method)
Seat belt installation requires a few more steps, but it’s extremely secure when done properly.
- Route the vehicle seat belt through the rear-facing belt path. Graco typically color-codes this in blue.
- Buckle the seat belt.
- Lock the seat belt.
Most modern vehicles have switchable retractors. Pull the shoulder belt all the way out until it clicks, then let it retract. You’ll hear a ratcheting sound as it feeds back in.
If your vehicle uses a locking latchplate instead, consult your manual.
Now press down on the seat firmly and pull the shoulder belt to remove slack. Feed the extra belt back into the retractor while maintaining pressure.
Test for tightness. Less than one inch of movement at the belt path. No more.
When families ask me how to install Graco 360 car seat rear facing without LATCH, this is the method I recommend with full confidence.
Step 5: Secure Your Child Properly
Installation is only half the equation.
Once the seat is secure, adjust the harness.
For rear-facing:
- Harness straps must be at or just below your child’s shoulders.
- Straps should lie flat with no twists.
- The chest clip sits at armpit level.
Now tighten the harness until you cannot pinch excess webbing at the collarbone. This is called the pinch test.
Parents often under-tighten. Snug is safe.
The Graco 360’s no-rethread harness makes adjustments easier, but ease doesn’t replace accuracy.
When thinking about how to install Graco 360 car seat rear facing safely, remember that harness fit matters just as much as base tightness.
Common Installation Mistakes I See All the Time
Even careful parents make these errors:
- Incorrect recline angle
- Installation movement greater than one inch
- Twisted LATCH straps
- Seat belt not locked
- Using both LATCH and seat belt
- Forgetting to check weight limits
Another subtle issue? Testing movement at the top of the seat. That’s misleading. Always test at the belt path.
These details separate an average installation from a secure one.
How to Double-Check Your Work
After installation, pause.
Grab the seat at the belt path and attempt to move it. Less than one inch is your benchmark. Recheck the recline bubble. Confirm the harness height.
Then step back and visually inspect everything.
I always recommend scheduling a Certified Passenger Safety Technician (CPST) inspection if available in your area. A second set of trained eyes provides peace of mind.
Recheck installation after a few days of driving. Seats can settle slightly into cushions.
If you truly want to master how to install Graco 360 car seat rear facing, commit to periodic checks.
Quick Reference: Rear-Facing Installation Checklist
| Checkpoint | What to Confirm |
| Recline Angle | Bubble indicator within allowed range |
| Installation Method | Either LATCH or seat belt (not both) |
| Tightness | Less than 1 inch movement at belt path |
| Harness Height | At or below shoulders |
| Chest Clip | Armpit level |
| Strap Tightness | No pinch at collarbone |
Use this table as your final scan before every ride.
Final Thoughts
Understanding how to install Graco 360 car seat rear facing isn’t complicated—but it does require attention to detail. The difference between a loose installation and a secure one can be life-changing.
Take your time. Apply firm pressure. Double-check your work.
I’ve installed hundreds of seats, and I still test every single one twice. You should too!
When installed correctly, the Graco 360 provides exceptional rear-facing protection. And now you know exactly how to install Graco 360 car seat rear facing with clarity and confidence.
Your child deserves nothing less.
Frequently Asked Questions
Check for less than one inch of movement at the belt path and confirm the recline indicator is within range.
No, use only one method unless your specific manual explicitly allows both.
Most models allow rear-facing up to 40 pounds, but always verify your seat’s label.
They must be at or just below your child’s shoulders.
It should move less than one inch side-to-side or front-to-back at the belt path.
Check your vehicle manual; some allow light contact while others prohibit bracing.
Only if permitted in the manual and needed to achieve the correct recline angle.
Switch when your child reaches the maximum combined LATCH weight limit listed in the manual.
Keep them rear-facing as long as possible within the seat’s height and weight limits.
No, rotation helps with access but does not change the installation method.