If you’re trying to figure out how to remove the Revolve360 car seat, you’re not alone. I’ve installed and uninstalled dozens of car seats over the years, and the Revolve360 is one of the most secure — and sometimes most stubborn — seats to take out. It’s solid. It’s heavy. And when it’s installed correctly, it does not want to budge.
That’s a good thing for safety. Not so great when you need to switch vehicles, deep-clean your back seat, or pass the seat down to another car.
In this guide, I’ll walk you step by step through how to remove the Revolve360 car seat safely and efficiently. Whether yours is installed with LATCH or a seat belt, rear-facing or forward-facing, you’ll know exactly what to do.
Why Removing the Revolve360 Can Feel Tricky
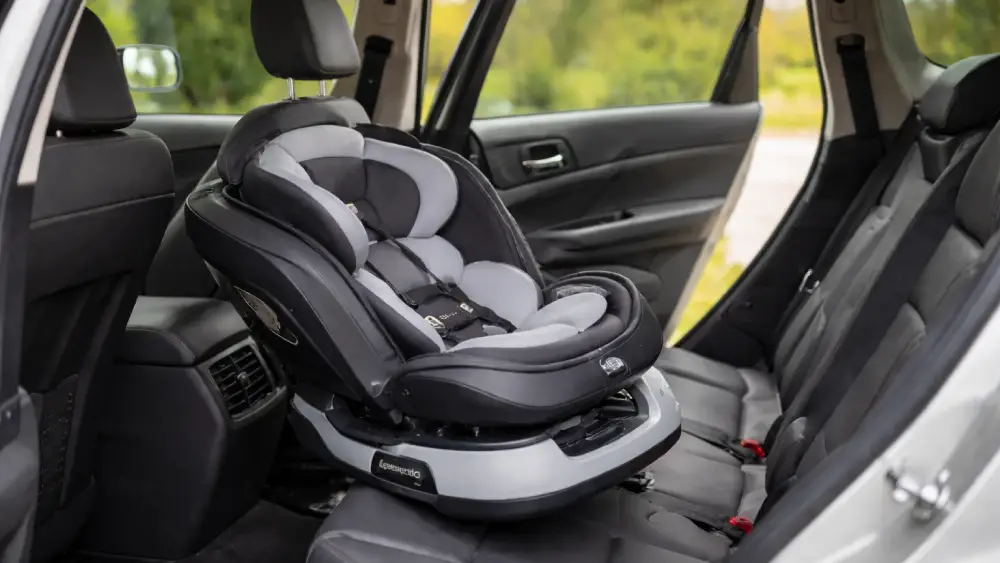
The Revolve360 isn’t like a traditional convertible seat. It has a rotating base system designed to stay firmly installed while the seat swivels for easy loading and unloading. That engineering adds weight and stability.
It also adds complexity.
Unlike lightweight infant seats that pop in and out, the Revolve360 anchors deeply into your vehicle seat. If installed properly, it should move less than an inch side to side. When it’s time to remove it, that tight installation can make you feel like it’s glued down.
It isn’t. It just requires a systematic approach.
Before You Start: What You’ll Need
You don’t need special tools to remove this seat. But a few small preparations make a big difference.
I recommend having:
- A flashlight (to see anchor connectors clearly)
- A towel or blanket (to protect your vehicle upholstery)
- Your car seat manual nearby
- A second adult if possible — the seat is heavy
The Revolve360 weighs over 25 pounds. Add the base and it feels even heavier because of its shape. Plan your lift before you pull it loose.
Safety First
Before we get into how to remove the Revolve360 car seat, a few quick reminders:
- Never attempt removal while your child is in the seat.
- Park on level ground.
- Turn off the vehicle.
- Work slowly and deliberately.
Rushing causes frustration. Frustration leads to mistakes.
Take your time.
Step 1: Identify Your Installation Method
This step changes everything.
The process for how to remove the Revolve360 car seat depends on how it was installed. There are two main methods:
- LATCH (Lower Anchors and Tethers for Children)
- Vehicle seat belt
If your seat was installed rear-facing with LATCH, you’ll see anchor connectors clipped to the metal bars between your vehicle seat cushions. If it was installed with a seat belt, you’ll see the belt threaded through a belt path on the base.
Forward-facing seats may also include a top tether strap connected behind the seat.
Take 30 seconds and confirm your setup before proceeding.
How to Remove the Revolve360 Car Seat (LATCH Installation)
If your seat is installed using LATCH, follow these steps carefully.
1. Rotate the Seat for Access
Turn the seat so it faces you. The swivel feature is your friend here.
This gives you better visibility and access to the tightening strap and connectors.
2. Locate the LATCH Tightening Strap
Find the adjustment strap used to tighten the installation. It’s usually accessible near the front of the base.
If it feels extremely tight, that means it was installed correctly. Good job.
3. Loosen the Strap Completely
Press the release button on the LATCH adjuster while pulling the strap back through to loosen it.
You may need to push the seat slightly toward the vehicle seat while loosening. That reduces tension and makes the strap easier to release.
Don’t yank. Apply steady pressure.
4. Detach the Lower Anchor Connectors
Once the strap is loose, locate the metal LATCH connectors on both sides.
Press the release button or lift the release tab (depending on the connector style) and slide them off the vehicle’s anchor bars.
If they don’t come off easily, push the base inward slightly to remove tension. That usually solves the problem instantly.
5. Remove the Top Tether (Forward-Facing Only)
If the seat is forward-facing, you must also disconnect the top tether strap located behind the vehicle seat.
Press the release button on the tether hook and unclip it.
Never lift the seat out while the tether is still attached.
6. Lift the Seat Out
Now comes the heavy part.
Grip the base firmly with both hands and lift straight up. Bend your knees. Keep your back straight.
It will feel substantial. That’s normal.
How to Remove the Revolve360 Car Seat (Seat Belt Installation)
If your installation uses a vehicle seat belt, the process differs slightly.
1. Rotate for Access
Again, swivel the seat to face you.
Visibility matters here.
2. Locate the Belt Path
Depending on whether your seat is rear-facing or forward-facing, the belt path will be in a different position.
Look carefully at where the seat belt threads through the base.
3. Unlock the Seat Belt
Most modern vehicle belts lock during installation. To unlock it, press the release button on the buckle.
If the belt feels stuck, slowly feed it back into the retractor while gently pulling it out again. This resets the locking mechanism.
4. Pull the Belt Out of the Belt Path
Carefully unthread the belt from the base. Work one side at a time if needed.
Avoid twisting the belt during removal. Twists create reinstallation headaches later.
5. Remove the Top Tether (Forward-Facing)
Just like with LATCH, disconnect the tether if the seat is forward-facing.
Don’t skip this step.
6. Lift the Base Out
Once the belt is fully removed, lift the seat straight up and out of the vehicle.
If it feels stuck, double-check that the belt is completely free. Even slight tension can hold it in place.
Rear-Facing vs Forward-Facing Removal Differences
The biggest difference when learning how to remove the Revolve360 car seat between these two modes is the tether.
Rear-facing installations typically do not use a top tether. That simplifies removal.
Forward-facing seats almost always do.
Additionally, forward-facing installations are often tightened more aggressively because of the child’s weight range. Expect more tension in the straps.
Work methodically.
Removing the Seat From the Base
In most situations, you should remove the entire unit — seat and base together.
The Revolve360 is designed as an integrated system. Separating components inside the vehicle is unnecessary and usually more complicated than helpful.
If you do need to detach the seat from the base (for cleaning or storage), do it outside the vehicle on a flat surface. Follow the manual precisely.
Improvisation is not your friend here.
Common Problems (and Fast Fixes)
Even when you know how to remove the Revolve360 car seat, small issues can slow you down. Here’s a quick troubleshooting table:
| Problem | Likely Cause | Solution |
| LATCH won’t loosen | Too much tension | Push base inward while pressing release |
| Seat belt won’t release | Locked retractor | Slowly feed belt fully back in |
| Tether stuck | Weight pulling forward | Push seat toward vehicle seatback |
| Base feels glued down | Compression from tight install | Rock gently side to side while lifting |
Most issues come down to tension.
Relieve tension first. Then release.
After Removal: Quick Cleaning Opportunity
Once the seat is out, take advantage of the moment.
Crumbs accumulate under car seats faster than anywhere else in your car. Vacuum thoroughly. Check for small objects wedged in the seat crease.
Wipe down the base with a damp cloth. Avoid harsh cleaners unless approved by the manufacturer.
Also inspect your vehicle seat for deep indentations. Some compression is normal. It usually rebounds over time.
Reinstalling Correctly After Removal
Knowing how to remove the Revolve360 car seat is only half the equation. Reinstallation must be just as careful.
After reinstalling, always:
- Perform the one-inch movement test at the belt path
- Confirm correct recline angle
- Check harness height
- Reattach tether if forward-facing
- Double-check LATCH or belt tightness
Then check again after your first drive.
Car seats settle.
Final Thoughts
Learning how to remove the Revolve360 car seat doesn’t have to be frustrating. The key is understanding how it was installed, relieving tension before attempting release, and moving step by step.
The seat is designed to be secure. That’s its job.
When you approach removal methodically, it comes out smoothly. I’ve done it many times, and every difficult removal has come down to one thing: tension that wasn’t fully released.
Slow down. Loosen first. Then detach.
You’ve got this!
Frequently Asked Questions
Check the belt path area—LATCH uses lower anchor connectors, while seat belt installation threads the vehicle belt through the base.
Always rotate the seat toward you and fully loosen the tension before trying to detach anything.
There’s likely too much tension; push the base into the vehicle seat while pressing the release button.
Yes, if the seat is forward-facing, the tether must be disconnected before lifting the seat out.
Yes, tight installations compress vehicle cushions, which can make the base feel temporarily stuck.
You can, but rotating it gives better access and makes how to remove the Revolve360 car seat much easier.
No, it’s safer and simpler to remove the entire unit together before separating components.
Many seat belts lock during installation; let it fully retract to reset the mechanism.
It should move less than one inch at the belt path, but fully loosen it before uninstalling.
Frequent reinstallation increases the risk of errors, so double-check tightness every time.