If you’ve just finished washing the fabric and are now staring at a pile of padding, elastic loops, and straps, you’re not alone. The first time I had to figure out how to put Joie 360 car seat cover back on, I remember thinking, this should be simpler than it feels. The good news? It is—once you know the correct order and what really matters.
This guide walks you through the process calmly and clearly. We’ll focus on accuracy, safety, and avoiding the small mistakes that cause big frustration later. Take your time. You’ve got this.
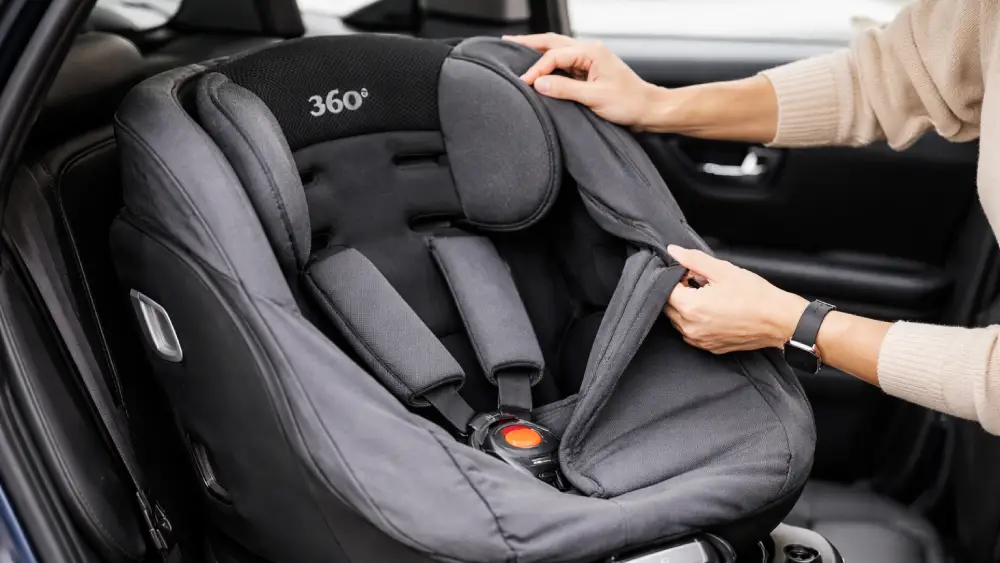
Understanding the Joie 360 Car Seat Design
Before touching the cover, it helps to understand how the Joie 360 is built.
This car seat has:
- A rotating shell designed for daily use
- A fitted fabric cover that wraps around the seat frame
- Integrated harness slots, padding, and inserts
The cover isn’t just decorative. It’s designed to sit flat, guide the harness correctly, and allow the seat to rotate freely. If it’s installed incorrectly, straps can twist, fabric can bunch, and comfort—and safety—can be affected.
That’s why learning how to put Joie 360 car seat covers back on properly is more important than it seems.
Safety Checks Before Reinstalling the Cover
Pause before you begin. This step saves time later.
Make sure:
- The cover is completely dry
- All padding pieces are present
- Harness straps are untwisted
- Buckles and chest clips move freely
Never reinstall a damp cover. Moisture can cause odors, fabric stretching, or mold over time.
Also, avoid removing harness straps unless the manual explicitly allows it. Most Joie models do not require harness removal to reinstall the cover.
Tools and Preparation
You don’t need tools. You do need space.
Set yourself up with:
- A flat surface or open car trunk
- Good lighting
- A few uninterrupted minutes
I’ve found that working slowly and methodically is the difference between a smooth reinstall and a frustrating redo.
Identifying the Joie 360 Seat Cover Pieces
Before putting anything back on, identify each piece.
Typically, you’ll have:
- The main seat cover
- Headrest cover
- Infant inserts (if applicable)
- Shoulder strap pads
- Elastic loops or hooks
Lay everything out. Match fabric shapes to the seat contours. This simple step makes how to put Joie 360 car seat cover back on much easier.
Step-by-Step: How to Put Joie 360 Car Seat Cover Back On
This is the heart of the process. Follow these steps in order.
Step 1: Position the Main Cover
Start with the main seat cover. Align the top of the cover with the headrest area of the seat shell.
Gently pull the fabric down over the seat, smoothing it as you go. Don’t force it. Proper alignment now prevents bunching later.
Step 2: Thread the Harness Through the Slots
This step requires patience.
Carefully feed each harness strap through its correct slot in the cover. Make sure:
- The straps are flat
- The slots line up evenly
- No fabric is trapped underneath
Harness alignment is critical. A twisted strap can compromise comfort and function.
Step 3: Secure Elastic Loops and Hooks
Most Joie 360 covers use elastic loops or hooks underneath the seat.
Attach them one by one:
- Start at the top
- Move to the sides
- Finish at the bottom
Keep tension even. The cover should feel snug, not stretched.
Step 4: Reinsert Padding and Inserts
If your model includes infant inserts or extra padding, reinstall them in the correct order.
Padding should sit flush against the seat shell, with no gaps or folds.
This step is often rushed. Don’t rush it.
Common Mistakes and How to Avoid Them
I’ve seen these happen again and again.
Mistake 1: Misaligned Harness Slots
If the cover shifts even slightly, harness slots won’t line up.
Fix: Pull the cover back slightly and realign from the top.
Mistake 2: Twisted Straps
Twists often happen during rethreading.
Fix: Fully extend the harness and flatten it before threading.
Mistake 3: Loose Fabric
Loose fabric can interfere with rotation.
Fix: Double-check all elastic loops and hooks.
Avoiding these mistakes makes how to put Joie 360 car seat cover back on much smoother.
Reinstalling the Headrest and Shoulder Pads
The headrest comes next.
Slide the headrest cover over the headrest foam and align it carefully. It should sit evenly without pulling to one side.
Then reinstall the shoulder strap pads:
- Slide them onto the harness
- Position them symmetrically
- Ensure straps move freely
If straps don’t slide smoothly, stop and adjust.
Final Fit and Safety Check
Before using the seat, do a full check.
Fit checklist:
- Cover lies flat with no bunching
- Harness straps move smoothly
- Buckle clicks securely
- Chest clip slides easily
- Seat rotates without resistance
Here’s a quick reference table:
| Checkpoint | What to Look For |
| Harness slots | Even and aligned |
| Fabric tension | Snug, not stretched |
| Padding | Flat and secure |
| Rotation | Smooth, unobstructed |
If anything feels off, fix it now. It’s easier than fixing it later.
Maintenance Tips for Next Time
A few habits make future reinstallations easier.
- Take photos before removing the cover
- Store inserts together
- Clean the base while the cover is off
- Avoid over-washing
These small steps reduce guesswork the next time you need to handle how to put Joie 360 car seat cover back on.
When to Stop and Recheck
If you notice:
- Harness resistance
- Uneven padding
- Difficulty rotating the seat
Stop. Recheck alignment. The cover should never interfere with seat function.
Why Correct Reinstallation Matters
A poorly installed cover can:
- Misalign the harness-
- Reduce comfort
- Interfere with rotation
- Create unnecessary wear
Doing it right protects both safety and longevity.
Final Thoughts
Learning how to put Joie 360 car seat cover back on isn’t about speed. It’s about order, alignment, and attention to detail. Once you’ve done it once or twice, the process becomes predictable—and far less intimidating.
I’ve found that laying everything out, starting from the top, and checking harness alignment early makes all the difference. Slow down. Trust the process. The seat will tell you when it’s right.
Flat fabric. Smooth straps. Easy rotation.
That’s when you know you’ve nailed it.
Frequently Asked Questions
Correct installation ensures the harness functions properly and the seat rotates smoothly without fabric interference.
Yes, most Joie 360 models are designed so the cover can be reinstalled without removing the harness straps.
Yes, the cover should always be fully dry to prevent odors, fabric stretching, or mold.
Stop and recheck the harness slots to ensure no fabric is trapped or straps are twisted.
A snug fit is normal, but the fabric should not be stretched or pulling unevenly.
Improper installation can restrict rotation, which is a sign the cover needs adjustment.
No tools are required; everything attaches using built-in elastic loops and hooks.
Padding should sit flat against the seat with no gaps, folds, or movement.
Yes, reinstall the main cover first, then add inserts and padding in the correct order.
Only when necessary for cleaning or maintenance, as frequent removal can cause unnecessary wear.