Installing a car seat can feel intimidating, even for experienced parents. I’ve installed more than a few over the years, and I’ll be honest—the first time I tackled how to install an Evenflo Revolve 360 car seat, I paused, reread the manual, and double-checked everything. That’s normal. This seat is innovative, sturdy, and incredibly parent-friendly once you understand it, but proper installation is essential for safety.
This guide walks you through the process step by step, with practical tips, clear checks, and real-world advice. No fluff. Just solid guidance you can trust.
Getting to Know the Evenflo Revolve 360 Car Seat
Before installation, it helps to understand what makes this seat different.
The Evenflo Revolve 360 is a rotating convertible car seat designed to make loading and unloading easier while maintaining high safety standards. The 360-degree rotation allows you to turn the seat toward the door, then lock it securely in position for travel.
Key features include:
- Rear-facing and forward-facing modes
- One-handed rotational mechanism
- Integrated leveling indicators
- LATCH and seat belt installation options
Knowing how these components work together will make the installation process smoother and more confident.
Safety Checks Before Installation
This is the part I never rush. Ever.
Before learning how to install an Evenflo Revolve 360 car seat, take a few minutes to prepare.
Do this first:
- Read the Evenflo manual cover to cover
- Check your vehicle owner’s manual for car seat guidelines
- Inspect the seat for missing or damaged parts
- Choose a rear seating position unless otherwise recommended
Not all vehicles and seating positions are the same. Compatibility matters.
Tools and Preparation
Here’s the good news. You don’t need tools.
What you do need is clarity.
Installation options
- LATCH system (lower anchors)
- Vehicle seat belt
You will only use one method at a time—never both.
The Evenflo Revolve 360 also includes built-in level indicators, which help ensure the correct recline angle, especially for rear-facing installation.
Rear-Facing Installation Using the LATCH System
Most children will start rear-facing, and this is often the easiest installation method.
Step-by-step process:
- Place the base on the vehicle seat
- Adjust the recline to match the level indicator
- Extend the LATCH connectors
- Attach LATCH hooks to vehicle anchors
- Press down firmly while tightening the straps
- Check for movement at the belt path
The seat should not move more than one inch side to side or front to back.
This is a core part of how to install an Evenflo Revolve 360 car seat correctly.
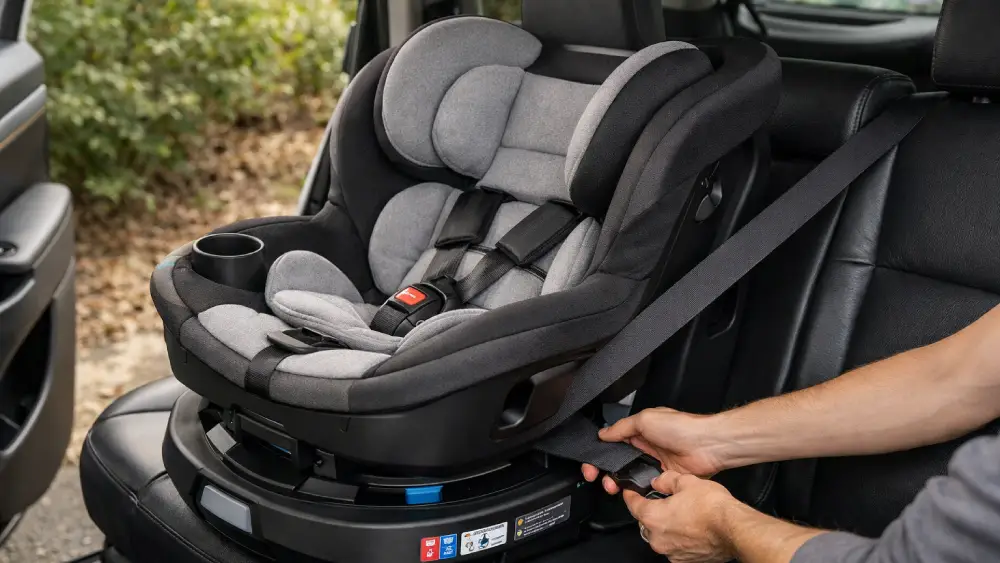
Rear-Facing Installation Using the Vehicle Seat Belt
Some vehicles or seating positions require seat belt installation. That’s perfectly fine.
Follow these steps:
- Route the seat belt through the rear-facing belt path
- Buckle the belt
- Lock the belt according to your vehicle’s instructions
- Apply downward pressure while tightening
- Verify the recline angle
Seat belt installation is just as safe when done correctly. Take your time here.
Transitioning to Forward-Facing Mode
Children should remain rear-facing as long as possible within the seat’s height and weight limits.
When it’s time to transition:
- Rotate the seat to forward-facing
- Adjust recline settings as instructed
- Confirm harness height placement
This transition is not just a flip of the seat. It requires careful adjustments to maintain safety.
Forward-Facing Installation Step by Step
Forward-facing installation always includes a top tether, which significantly reduces head movement in a crash.
Installation overview:
- Attach lower anchors or seat belt
- Tighten securely
- Connect top tether to vehicle anchor
- Remove slack from tether
Here’s a quick comparison:
| Installation Method | Required Components |
| LATCH | Lower anchors + top tether |
| Seat Belt | Seat belt + top tether |
Never skip the tether. It’s essential.
Using the 360-Degree Rotation Feature Correctly
The rotating feature is a game-changer. But it must be used properly.
Best practices:
- Rotate only when the seat is unlocked
- Always lock before driving
- Listen for the audible click
- Confirm visually that it’s secure
One common mistake I see is forgetting to lock the seat back into position. Make it a habit to double-check every time.
Harness Adjustment and Child Fit Check
Installation doesn’t stop with securing the seat. Fit matters.
Proper harness setup:
- Harness straps at or below shoulders (rear-facing)
- Harness straps at or above shoulders (forward-facing)
- Chest clip at armpit level
- Snug fit with no slack
A quick test: You shouldn’t be able to pinch excess strap at the shoulder.
This step is often overlooked when people focus only on how to install an Evenflo Revolve 360 car seat, but it’s just as important.
Common Installation Problems and Fixes
Even when you follow instructions, issues can pop up.
Common problems:
- Seat feels loose
- Incorrect recline angle
- Rotation doesn’t lock
- Difficulty tightening straps
Solutions:
- Re-check belt path
- Apply pressure while tightening
- Confirm tether placement
- Adjust recline settings
If something feels off, stop and reassess. Rushing leads to mistakes.
Final Safety Inspection
Before your first drive, do a full check.
Final checklist:
- Seat moves less than one inch
- Rotation is locked
- Harness adjusted correctly
- Buckle clicks securely
- Tether attached (if forward-facing)
If you’re unsure, consider having a Child Passenger Safety Technician inspect your work. I’ve done this myself, and the peace of mind is worth it.
Frequently Asked Installation Questions
Parents ask great questions. Here are a few I hear often.
- Is LATCH safer than a seat belt?
Both are equally safe when used correctly. - Can I install it in the front seat?
Rear seats are strongly recommended unless your vehicle manual allows otherwise. - How often should I check the installation?
Every few weeks, and after any major adjustment.
Final Thoughts
Learning how to install an Evenflo Revolve 360 car seat takes patience, but it’s absolutely manageable. Once installed correctly, this seat offers incredible convenience without sacrificing safety. I’ve found that slowing down, following each step carefully, and doing regular checks makes all the difference.
You don’t need to be an expert. You just need to be thorough.
And once it’s installed properly?
That smooth rotation every day feels like a small win.
Frequently Asked Questions
Most parents can complete the installation in 20–30 minutes when following the instructions carefully.
Both methods are equally safe as long as you follow the correct steps and secure the seat tightly.
No, the seat must be locked into position before driving to ensure safety.
Yes, the top tether is required for forward-facing installation and helps reduce forward movement in a crash.
The seat should not move more than one inch side to side or front to back at the belt path.
It depends on your vehicle’s design and whether that seating position has approved anchors or seat belt access.
Children should remain rear-facing as long as possible within the height and weight limits listed by Evenflo.
Professional help is not required, but a Child Passenger Safety Technician can provide added peace of mind.
You should recheck the installation every few weeks and after any adjustments or vehicle changes.
The most common mistake is forgetting to lock the rotation feature before driving.