Rotating car seats are built to stay secure, which is great for safety—but it can make removal confusing the first time. If you’re looking for how to remove Maxi-Cosi 360 car seat from base, the process depends on the specific Maxi-Cosi 360 model and how it’s designed to function.
Unlike infant carrier systems, most Maxi-Cosi 360 seats are not meant for daily detachment. Some models allow limited separation for maintenance, while others require removing the seat and base together. This guide explains what to expect, how to remove the seat safely if your model allows it, and what to check before reinstalling.
Let’s walk through it step by step.
Important Things to Know Before You Start
Before attempting removal, keep these points in mind:
- Many Maxi-Cosi 360 seats are one-piece rotating systems
- Some models do not allow full separation of seat and base
- The seat must be locked in a travel position before removal
- Forcing parts apart can damage the rotation and locking mechanisms
Always confirm your exact model by checking the manual or label on the seat.
Before Removing the Maxi-Cosi 360 From the Base
Preparation makes the process easier and safer.
Before starting:
- Park the vehicle on level ground
- Remove your child from the seat
- Rotate the seat into a locked rear-facing or forward-facing position
- Fully loosen the harness
- Identify whether your model supports seat-to-base separation
Never attempt removal while the seat is rotated toward the door.
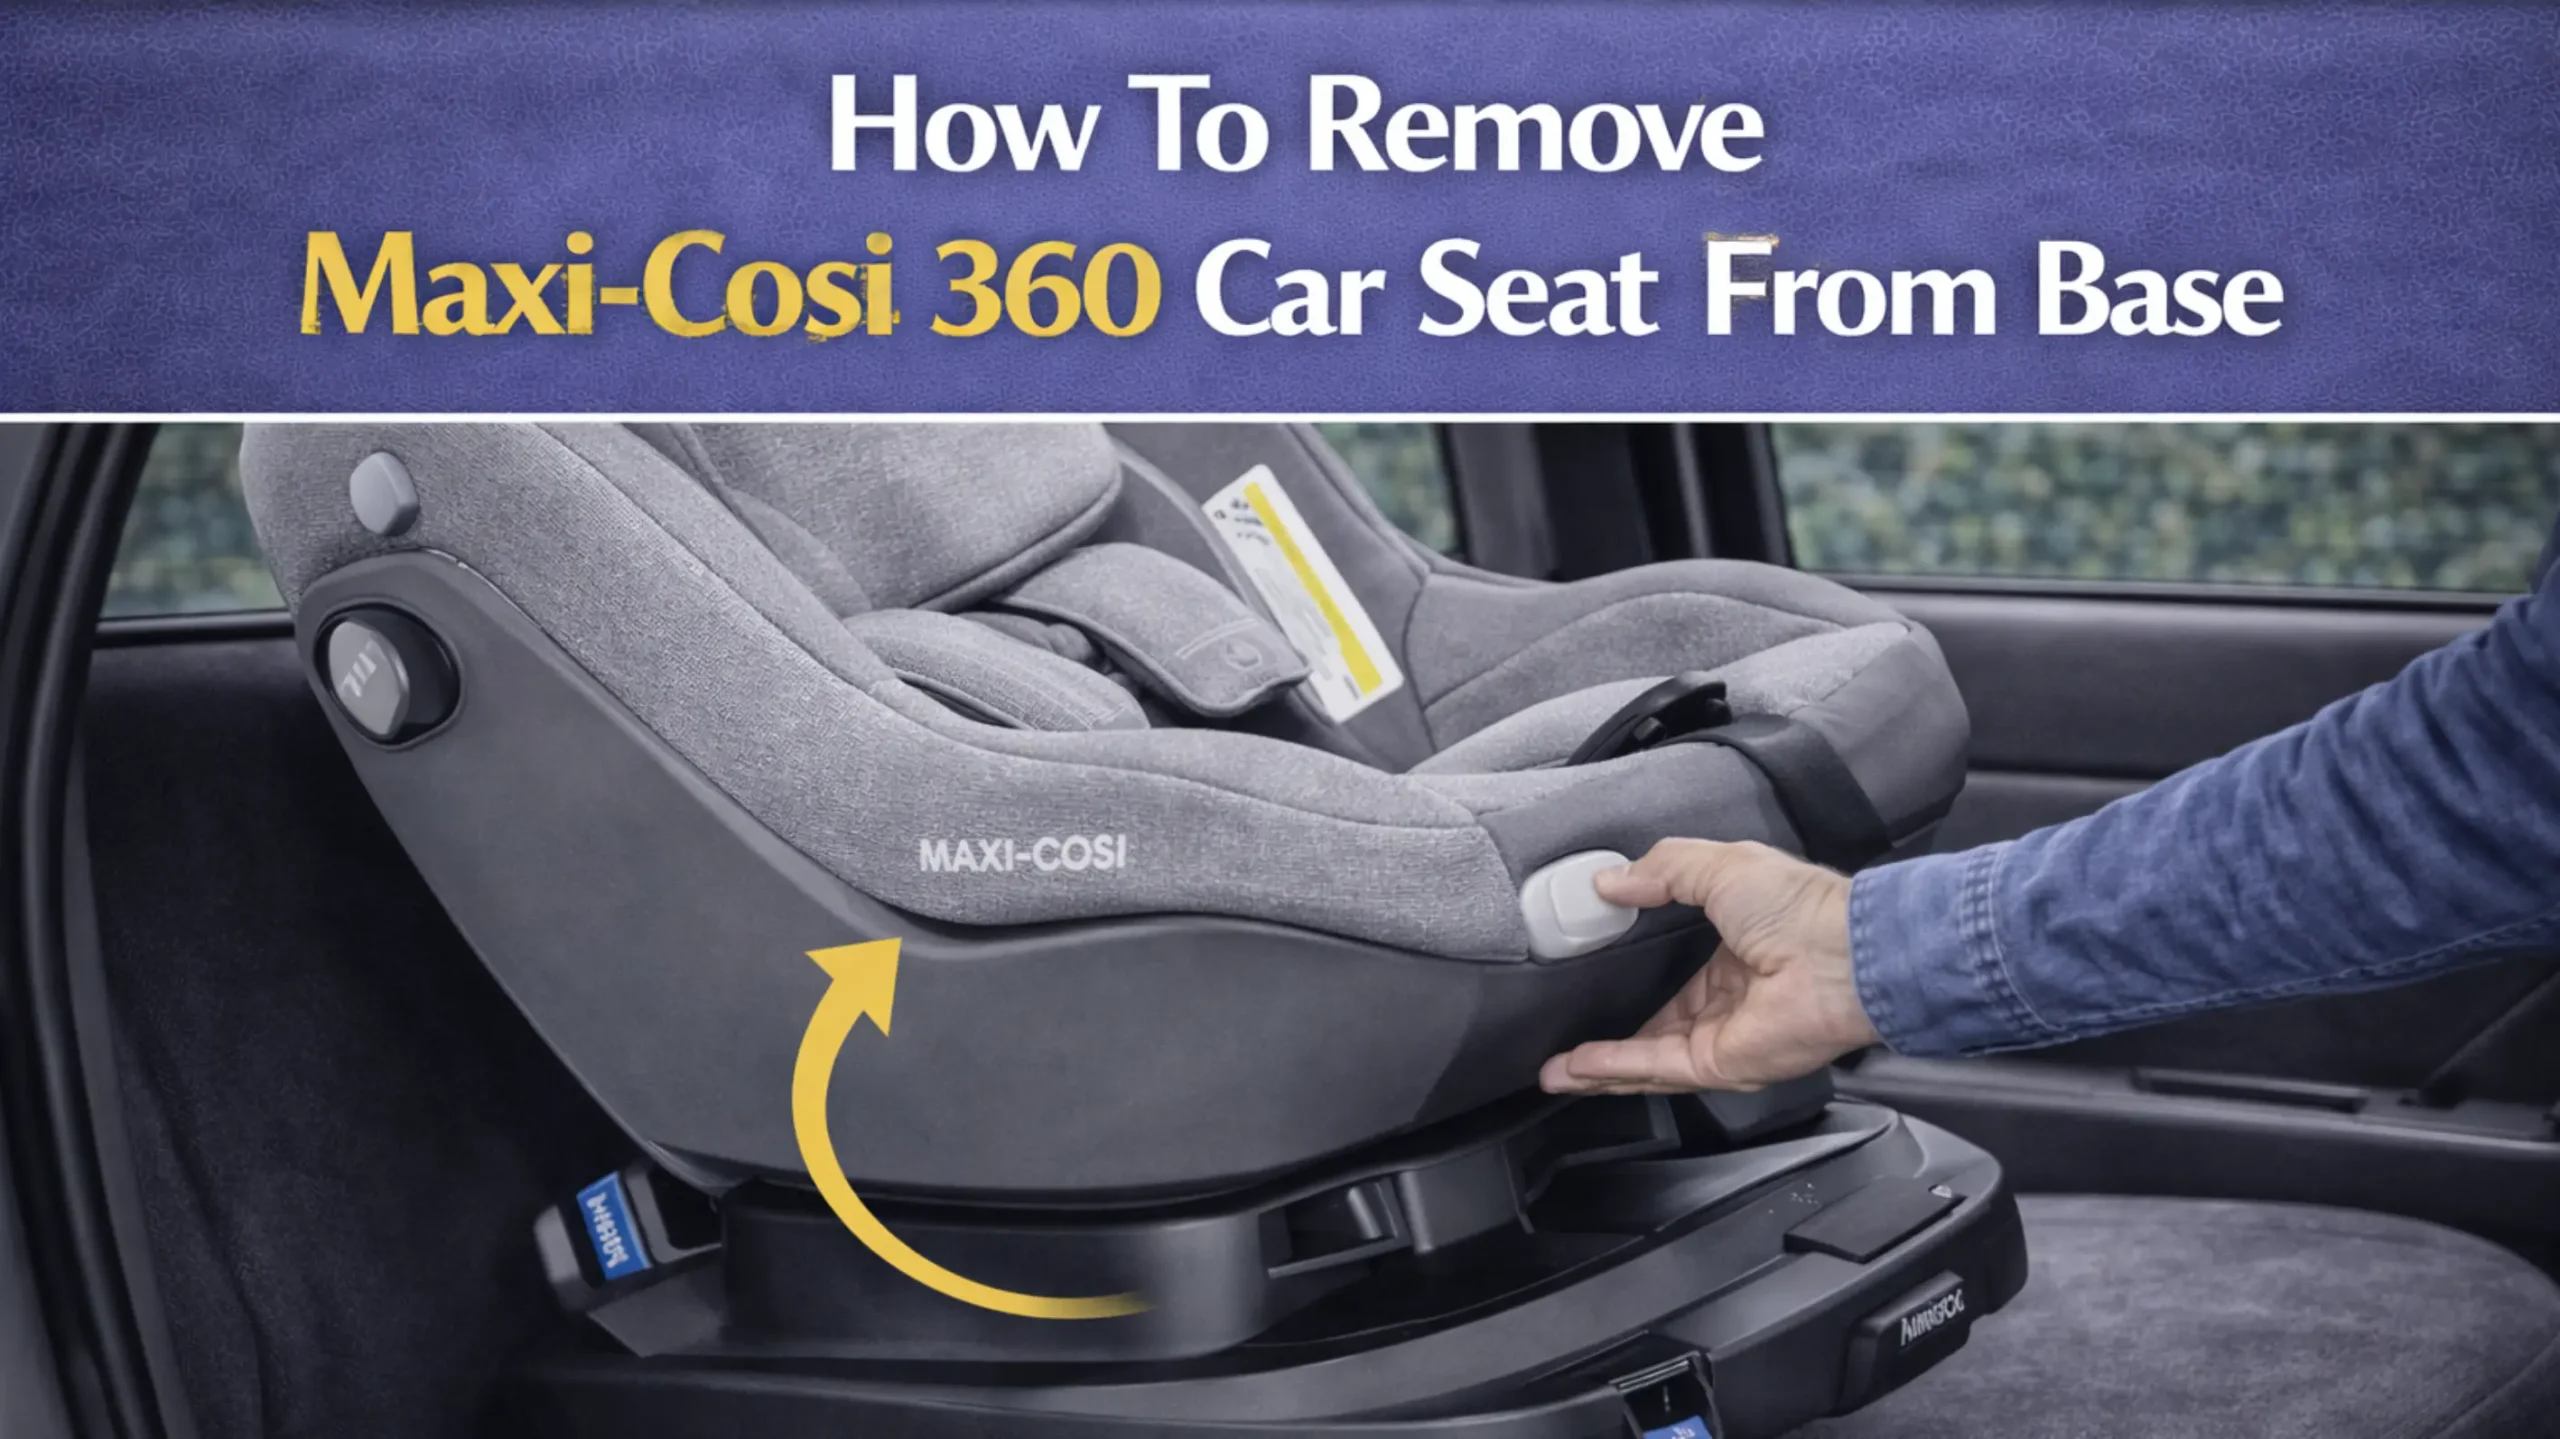
How To Remove Maxi-Cosi 360 Car Seat From Base (If Your Model Allows It)
Some Maxi-Cosi 360 models include a release mechanism.
Step 1: Locate the release handle or button
The release is usually found:
- At the back of the seat shell
- Under the seat near the base connection
- Along the lower rear edge of the seat
It may be recessed and require firm pressure.
Step 2: Engage the release
Press or pull the release while supporting the seat with your other hand. Keep steady pressure on the release.
Step 3: Lift the seat straight up
Once disengaged, lift the seat vertically off the base. Avoid twisting or angling the seat during removal.
Step 4: Clear the base completely
Ensure the seat is fully detached before moving it away from the vehicle.
If the seat does not lift easily, stop and recheck the release.
If Your Maxi-Cosi 360 Does NOT Detach From the Base
This is normal for many models.
In this case:
- Remove the entire seat-and-base unit from the vehicle
- Do not attempt to separate the seat from the base
- Remove only fabric covers and padding for cleaning
Attempting to force separation can damage the seat.
Common Reasons the Seat Won’t Come Off
If removal feels difficult, check for:
- The seat not locked in a travel position
- The release lever not fully engaged
- Installation tension still present
- A model that does not support separation
Never use tools or excessive force.
Reinstalling the Seat Onto the Base
If your model allows reattachment:
- Align the seat with the base guides
- Lower it straight down
- Press until you hear or feel a secure click
- Gently tug upward to confirm it’s locked
Always test rotation and locking before placing your child back in the seat.
After Removal: What to Inspect
Once removed:
- Check locking points for damage
- Inspect the rotation mechanism
- Confirm harness and recline controls move smoothly
If anything feels loose or damaged, contact Maxi-Cosi before reuse.
Final Thoughts
Learning how to remove Maxi-Cosi 360 car seat from base starts with understanding whether your model is designed to detach at all. These seats prioritize stability and safety, which means removal isn’t always simple—or necessary.
When in doubt, consult the manual or reach out to Maxi-Cosi support. A properly functioning seat is always worth the extra caution.
Frequently Asked Questions
Some models allow seat-to-base separation, but many are designed as one-piece systems and do not detach.
Check your user manual or the labels on the seat; detachable models clearly list removal instructions.
If available, it’s usually located at the rear or underside of the seat near the base connection.
For non-detachable models, yes—the seat and base must be removed together.
No, the seat must be locked in a rear-facing or forward-facing travel position first.
Common reasons include a locked travel position not engaged, an unreleased latch, or a non-detachable model.
No, forcing removal can damage the rotation and locking mechanisms and compromise safety.
Remove only the fabric covers and padding designed for cleaning; keep the seat and base together.
Align the guides, lower the seat straight down until it clicks, and gently tug to confirm it’s locked.
Contact support if the release won’t engage, parts look damaged, or the seat won’t lock securely after reattachment.