The first time I had to figure out how to get Joie 360 car seat out, I assumed it would be quick. Five minutes. Maybe ten. I was wrong. Rotating seats are brilliant when installed, but removing them can feel confusing if you don’t know the exact sequence. Buttons hide. Locks resist. And suddenly you’re sweating in a parked car, wondering if you’re doing something unsafe.
Here’s the good news.
Removing a Joie 360 car seat is completely manageable when you understand how the system is designed to release. It’s not about strength. It’s about order. This guide walks you through it calmly, clearly, and safely—so you can remove the seat without forcing anything or second-guessing yourself.
Understanding the Joie 360 Car Seat Design
Before we touch anything, it helps to understand why this seat behaves the way it does.
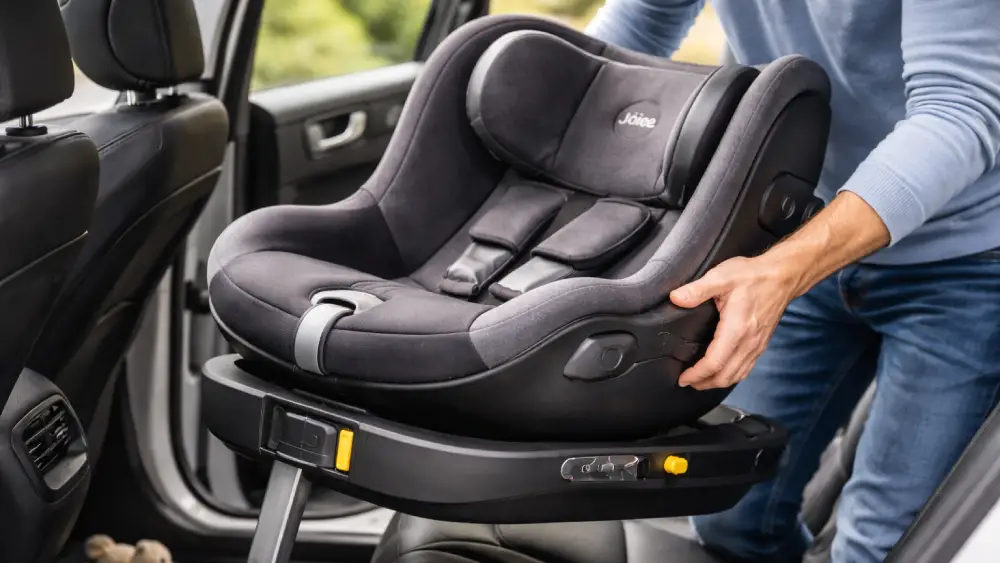
The Joie 360 is built around three core systems working together:
- A rotating seat shell
- ISOFIX connectors that anchor into your vehicle
- A support leg that stabilizes the base against the floor
This design is excellent for safety and daily use. But it also means removal must happen in the correct sequence. The seat will resist if it’s not in the right position. That’s intentional.
Key design features that affect removal
- The seat must be rotated to a specific position before detaching
- ISOFIX connectors lock automatically under tension
- The support leg must be retracted fully before lifting
If you remember nothing else, remember this:
The Joie 360 doesn’t come out unless it wants to.
Your job is to guide it, not wrestle it.
Safety Checks Before Removing the Joie 360 Car Seat
Pause before pulling anything.
This isn’t busywork. These checks prevent damage to your car, the seat, and your back.
Before you start
- Park on flat ground
- Turn the engine off
- Remove your child from the seat
- Clear loose items from the footwell
- Give yourself space to work
Also, make sure you’re calm. Seriously. Rushing leads to forcing. Forcing leads to mistakes.
Tools and Preparation You’ll Need
You don’t need tools.
You need access.
That’s it.
Optional but helpful:
- A flashlight (for seeing ISOFIX release points)
- Gloves (if space is tight)
- A second adult (helpful, not required)
What you should not grab:
- Screwdrivers
- Pliers
- Anything metal
If something requires tools, you’re doing the wrong thing.
Step-by-Step: How to Get Joie 360 Car Seat Out Using ISOFIX
This is the most common setup, so we’ll start here.
Step 1: Rotate the seat into removal position
Turn the seat so it faces forward. Most Joie 360 models require a forward-facing position to access the release controls properly.
If the seat won’t rotate:
- Check that the support leg is firmly on the floor
- Make sure the seat is unlocked
- Rotate slowly and deliberately
Never force the rotation.
Step 2: Locate the ISOFIX release buttons
The ISOFIX connectors sit at the base of the seat where it meets the vehicle seat.
You’re looking for:
- Release buttons or levers on both sides of the base
- Usually marked or color-coded
These buttons must be pressed simultaneously or in sequence, depending on the model.
Step 3: Release ISOFIX connectors
Press the release buttons firmly.
You may feel resistance. That’s normal.
What’s not normal:
- Yanking
- Rocking violently
- Pulling only one side loose
Once released, the base should move slightly away from the vehicle seat.
Step 4: Pull the seat away from the anchors
With ISOFIX released, gently pull the entire seat forward.
If it doesn’t move:
- Double-check both connectors
- Re-press release buttons
- Ensure the support leg is still locked down
At this stage, the seat should feel free—but don’t lift yet.
How to Release and Remove the Support Leg
This step matters more than people realize.
The support leg is designed to take load. If it’s still extended, the seat won’t come out cleanly.
Step-by-step support leg removal
- Locate the support leg adjustment button
- Press or pull to unlock
- Slide the leg upward until fully retracted
- Lock it into its stowed position
Some models require you to keep the button engaged while retracting. Go slow.
Common mistakes here
- Trying to lift the seat before retracting the leg
- Not fully locking the leg into place
- Letting the leg snap upward uncontrolled
Once the leg is stowed, the seat is ready to lift.
Removing the Joie 360 Car Seat Without ISOFIX (If Applicable)
Some installations use a seat belt instead of ISOFIX. The process changes, but the principles remain the same.
If your Joie 360 is seat belt installed
- Rotate the seat to the forward-facing position
- Locate the belt path
- Fully unbuckle the seat belt
- Feed the belt back through the guides carefully
Do not let the belt twist or snap back aggressively. That creates future headaches.
Differences from ISOFIX removal
| Feature | ISOFIX | Seat Belt |
| Anchor system | Metal connectors | Vehicle belt |
| Release method | Buttons/levers | Unbuckle + feed |
| Resistance | Spring-loaded | Tension-based |
| Removal speed | Faster once learned | Slightly slower |
Once the belt is fully released and cleared, the seat can be lifted out normally.
Troubleshooting Common Removal Problems
This is where most people get stuck. Let’s fix that.
“The seat won’t come off the ISOFIX”
Likely causes:
- One connector still locked
- Seat not in correct rotation position
- Uneven pressure on release buttons
Solution:
Press both release buttons firmly while gently pulling the base forward.
“The support leg won’t retract”
Likely causes:
- Button not fully engaged
- Leg under load
- Floor mat interfering
Solution:
Push the seat slightly back into position to relieve pressure, then retract.
“The seat feels heavy or stuck”
That’s normal. These seats are solid.
But if it feels immovable:
- Stop
- Reset
- Recheck each step
Never use brute force.
Safety Tips While Lifting and Carrying the Seat
Now the seat is free. Time to lift.
And yes, it’s heavier than it looks.
Safe lifting tips
- Bend your knees
- Keep your back straight
- Lift from the base, not the shell
- Avoid twisting while lifting
If you’re moving it far, carry it close to your body.
Where to place the seat after removal
- Flat surface
- Away from direct heat
- Not balanced on the support leg
Treat it like safety equipment. Because it is.
What to Do After Removing the Joie 360 Car Seat
Removal creates opportunity.
Use it.
Smart things to do now
- Inspect ISOFIX connectors for debris
- Check support leg for smooth movement
- Vacuum crumbs from the base
- Clean fabric if needed
This is also a great time to review the manual. Not exciting. But useful.
Reinstalling vs Fully Removing: What Parents Should Know
Some parents remove the seat often. Others almost never do.
Here’s how to decide.
Temporary removal makes sense when:
- Cleaning the car interior
- Switching cars briefly
- Adjusting seating layout
Full removal is better when:
- Traveling
- Selling or storing the seat
- Deep cleaning
Frequent removal won’t damage the seat if done correctly. Rough handling will.
Tips to Make Future Removal Easier
Here’s where experience pays off.
Small habits that help
- Always rotate to forward-facing before removal
- Keep ISOFIX release points clean
- Avoid jamming items near the base
- Practice removal once when you’re not rushed
The second time you figure out how to get Joie 360 car seat out, it feels easier. The third time, it’s routine.
Quick Reference Table: Removal Checklist
| Step | Action | Why It Matters |
| 1 | Rotate seat forward | Unlocks release path |
| 2 | Release ISOFIX | Frees base |
| 3 | Retract support leg | Prevents floor resistance |
| 4 | Lift carefully | Avoids injury |
| 5 | Inspect components | Maintains safety |
Final Thoughts
Learning how to get Joie 360 car seat out isn’t about memorizing instructions. It’s about understanding the system and respecting the order it expects.
Rotate.
Release.
Retract.
Lift.
That’s the rhythm.
Once you’ve done it once, the mystery disappears. The second time feels faster. And soon, removing the seat becomes just another routine task—handled calmly, confidently, and safely.
And that’s exactly how it should be.
Frequently Asked Questions
Press the ISOFIX release buttons fully and pull the base forward gently—never yank or twist the seat.
Yes, rotating it to the correct position makes the ISOFIX release points accessible and reduces tension.
They’re usually under tension, so press the release buttons firmly while easing the seat slightly forward.
Unlock the leg using the adjustment button and slide it upward until it fully locks into the stored position.
Yes, most people can, but it’s easier if you give yourself space and lift using your legs, not your back.
Double-check that both connectors are released and the support leg is fully retracted before lifting.
No, as long as you reinstall it correctly and ensure the ISOFIX indicators show a proper lock.
Once you know the steps, it usually takes about 2–5 minutes.
Yes, but you’ll need to unbuckle the belt and carefully feed it back through the belt path guides.
Inspect the ISOFIX connectors, support leg, and base for debris or damage before reinstalling or storing it.