Installing a car seat shouldn’t feel like assembling a spaceship. And yet, the first time you try to install a Safety First 360 car seat, it can feel exactly like that. Straps everywhere. Anchors hiding in the seat crease. A rotating base that seems helpful… but slightly intimidating.
Take a breath. This is manageable.
In this guide, I’ll walk you through exactly how to install Safety First 360 car seat models correctly—rear-facing, forward-facing, with LATCH, with a seat belt—without confusion or wasted time. We’ll cover what actually matters, how to test your install properly, and the small mistakes that cause most re-dos.
Let’s get it locked in. Literally.
Before You Start: Set Yourself Up for Success
Don’t rush this. Ten focused minutes now can prevent months of second-guessing.
Here’s what you need:
- Your Safety 1st 360 car seat
- Your vehicle owner’s manual
- The car seat manual
- A flashlight (trust me)
- Optional: a tightly rolled towel if your manual allows angle adjustment
One rule overrides everything:
If your vehicle manual and car seat manual disagree, follow the stricter instruction.
That single principle eliminates most installation confusion.
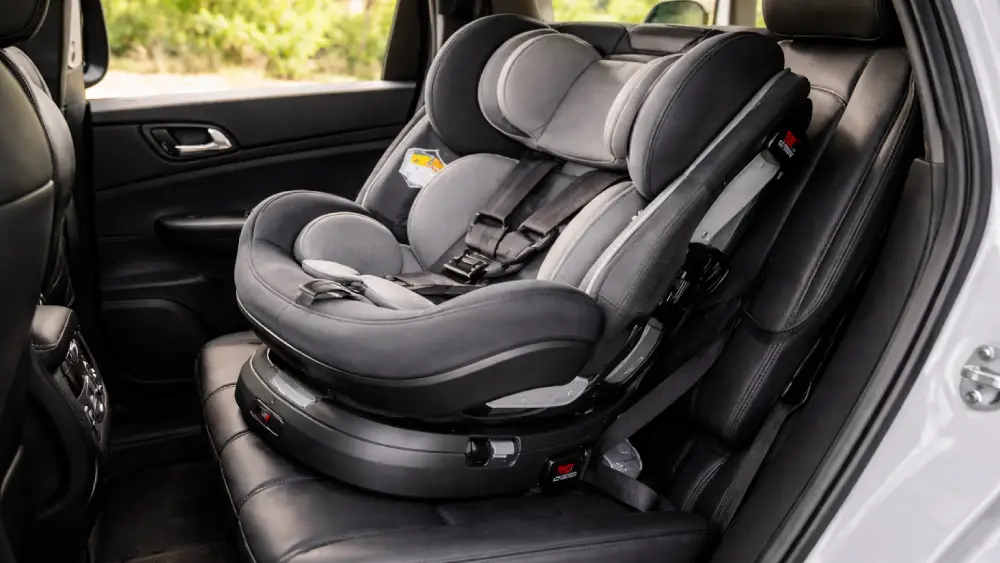
Know Your Car Seat Parts (This Saves Time)
Before you attempt to install Safety First 360 car seat systems, identify the key components. It makes the process faster and prevents routing errors.
Here’s what you’re working with:
| Component | What It Does | When It’s Used |
| Rotating seat mechanism | Allows seat to turn toward door | Convenience feature only |
| Rear-facing belt path | Secures seat in rear-facing mode | Infants & toddlers |
| Forward-facing belt path | Secures seat in forward-facing mode | Older toddlers |
| LATCH connectors | Attach to vehicle lower anchors | Alternative to seat belt |
| Top tether strap | Reduces forward head movement | Forward-facing only |
| Recline indicator | Confirms correct angle | Critical for rear-facing |
Important: The rotation feature does not replace proper installation. It doesn’t tighten the seat. It doesn’t secure the base. Install comes first. Rotation comes after.
Choosing the Safest Position in Your Vehicle
Back seat. Always.
From there, you have options:
Center seat
- Often safest in side impacts
- May not have LATCH anchors
- Sometimes uneven or raised
Outboard seat (behind driver or passenger)
- Easier access
- More likely to have LATCH
- Slightly closer to door
Here’s what matters more than position: a tight fit.
If the center seat won’t allow a secure install, choose an outboard position where the seat installs tightly and rotates without obstruction.
Do a quick dry run. Place the seat. Rotate it. Open and close the door. Make sure nothing interferes before tightening everything down.
Rear-Facing Installation (Most Important Phase)
Rear-facing is statistically safer. Keep your child rear-facing as long as your seat’s weight and height limits allow.
Let’s walk through how to install Safety First 360 car seat rear-facing.
Step 1: Confirm Rear-Facing Mode
- Adjust recline to rear-facing position
- Check weight and height limits on the label
- Ensure recline indicator shows correct angle
The recline angle is not optional. Too upright and your baby’s head can slump forward. Too reclined and the seat may not perform properly in a crash.
Get the line level.
Step 2: Install Using LATCH (Rear-Facing)
This is usually faster.
- Locate your vehicle’s lower anchors (buried in seat crease)
- Pull out LATCH connectors from storage
- Route them through the rear-facing belt path
- Attach connectors to anchors (listen for the click)
- Press down firmly where your child’s bottom would sit
- Tighten the strap while applying pressure
Use your knee or forearm. Put weight into it.
Then test it.
Grab the seat at the belt path only and try to move it side-to-side and front-to-back.
Movement should be less than 1 inch.
If it shifts more? Tighten again.
Step 3: Install Using the Seat Belt (Rear-Facing)
If LATCH isn’t available—or you prefer the belt method—this works just as well when done correctly.
- Route seat belt through rear-facing belt path
- Buckle the belt
- Lock the seat belt (pull all the way out until clicking sound begins)
- Feed slack back in while pressing down on seat
- Tighten firmly
Many failed installs happen because the belt wasn’t locked. If the belt slides freely, it isn’t secure.
Again—check movement at the belt path. Under 1 inch.
Step 4: Test the Rotation
Once installed, rotate the seat.
It should:
- Lock smoothly
- Not loosen the install
- Return to driving position with a click
If rotation changes tightness, uninstall and reinstall. A rotating feature is convenient. A secure install is mandatory.
You’ve now successfully completed the hardest part of how to install Safety First 360 car seat systems.
Forward-Facing Installation
Forward-facing changes a few critical elements. Most importantly: the top tether.
Confirm Forward-Facing Readiness
Before switching:
- Child must meet minimum weight/height requirements
- Harness straps should be at or above shoulders
- Recline adjusted to forward-facing position
Double-check the label. Every time.
LATCH Installation (Forward-Facing)
- Route LATCH connectors through forward-facing belt path
- Attach to anchors
- Press down and back into vehicle seat
- Tighten strap fully
Then attach the top tether.
Seat Belt Installation (Forward-Facing)
- Route seat belt through forward-facing belt path
- Buckle and lock the belt
- Press seat back into vehicle seat
- Remove all slack
Again—tight at the belt path. Under 1 inch movement.
Attach the Top Tether (Do Not Skip This)
This reduces forward head movement dramatically in a crash.
Steps:
- Locate tether anchor (often on back of seat or cargo floor)
- Attach hook
- Tighten until snug
No slack. No sagging.
When people ask how to install Safety First 360 car seat correctly in forward-facing mode, this is where many cut corners. Don’t.
The 1-Inch Rule (Your Gold Standard)
Here’s the only movement test that matters:
- Grab the seat at belt path
- Push and pull
- Measure movement
If it moves more than 1 inch side-to-side or front-to-back, it’s too loose.
Do not test at the top of the seat. It will move there. That’s normal.
Belt path is the only measurement point.
Harness Setup After Installation
Installation secures the seat. Harness secures the child.
Two separate jobs.
Rear-Facing
- Straps at or below shoulders
- Chest clip at armpit level
- No slack (pinch test)
Forward-Facing
- Straps at or above shoulders
- Chest clip at armpit level
- Snug fit
The pinch test is simple. Try to pinch strap at shoulder. If you can pinch fabric, tighten more.
And skip bulky coats. They compress in crashes. Use a blanket over the harness instead.
Common Mistakes (And Fixes)
Even experienced parents make these.
- Using LATCH and seat belt together
Usually not allowed. Use one unless manual says otherwise. - Wrong belt path
Rear-facing and forward-facing paths are different. Double-check routing. - Seat belt not locked
If it slides freely, it’s wrong. - Skipping top tether forward-facing
Always attach. - Recline angle incorrect
Adjust before tightening fully. - Twisted harness straps
Untwist before securing child.
These errors are why many parents reinstall multiple times. Slow down. Check each step.
Troubleshooting Tough Installs
If you’re struggling to install Safety First 360 car seat units securely, here’s what to try.
Seat won’t tighten enough
- Apply more body weight
- Pull slack from inside belt path opening
- Try switching from LATCH to seat belt
Recline won’t line up
- Adjust recline before tightening
- Try different seating position
Anchors hard to access
- Use flashlight
- Pull vehicle seat cushion slightly forward
- Consider seat belt method instead
Rotation hits seatback
- Adjust front vehicle seat position
- Move car seat to alternate rear location
Sometimes changing seating position solves everything instantly.
Quick Safety Checklist Before Every Ride
Short. Direct. Non-negotiable.
- Seat tight at belt path
- Harness passes pinch test
- Chest clip at armpit level
- Rear-facing recline correct
- Top tether attached (forward-facing)
That’s it. Five checks.
When to Get Professional Help
There is no shame in asking.
A Certified Child Passenger Safety Technician (CPST) can:
- Inspect your install
- Correct routing mistakes
- Teach you hands-on
Bring both manuals. Expect a hands-on demonstration.
If you’ve followed this guide and still feel uncertain about how to install Safety First 360 car seat models correctly, that extra layer of review is worth it.
Final Thoughts
Installing a rotating car seat isn’t complicated. It’s methodical.
Once you understand belt paths, locking mechanisms, and the 1-inch rule, everything clicks into place. The first install might take 20 minutes. The second will take 5.
Confidence replaces anxiety quickly.
And that’s the goal.
Now you know exactly how to install Safety First 360 car seat systems the right way—rear-facing, forward-facing, LATCH or seat belt—with clarity and precision.
Secure seat. Proper harness. Every ride.
That’s how safety actually works.
Frequently Asked Questions
It should move less than 1 inch side-to-side or front-to-back when tested at the belt path.
In most cases, no—use one method unless your manual specifically allows both.
Pull the belt all the way out and listen for a clicking sound as it retracts, which indicates it’s locked.
Only when your child meets the minimum height and weight requirements listed on the car seat label and manual.
No, rotation is for convenience; you must fully secure the seat before using the swivel function.
Follow the recline indicator on the seat and ensure the level line matches the approved range in the manual.
Yes, the top tether significantly reduces forward head movement and should always be attached.
The back seat is safest, and the center position is ideal if it allows a secure installation.
Movement at the top is normal; only test for tightness at the belt path.
Review the manual, perform the 1-inch test, and consider having a Certified Child Passenger Safety Technician inspect your setup.