Let’s be honest: learning how-to install Evenflo car seat 360 sounds like it should be easy. It rotates! It’s premium! It’s built for real parents who are juggling a hundred things! And yet… the first time you set it on your back seat, it can feel like you’re assembling a spaceship with one hand while holding a toddler with the other.
I’ve been there. I’ve also watched plenty of smart, capable adults install this seat in a way that looks right… but isn’t tight enough to be safe.
So in this guide, I’m going to walk you through how-to install Evenflo car seat 360 step-by-step, without fluff. We’ll cover seat belt installs. We’ll cover rear-facing and forward-facing. And yes, we’ll cover the most common mistakes people make with the Revolve360.
Let’s make this simple. And safe.
Which Evenflo “360” Seat Are You Installing?
Evenflo has a few models that people casually call “the Evenflo 360.” The good news? The core installation logic is basically the same.
Here are the most common:
- Evenflo Revolve360
- Evenflo Revolve360 Extend
- Evenflo Revolve360 Slim
If you’re searching how-to install Evenflo car seat 360, you’re almost certainly dealing with one of those.
Why does the exact model matter? Because the recline settings, the weight limits, and the “when to switch to forward-facing” rules can differ slightly. And those details aren’t optional. They’re the whole point.
If you still have the box or manual, grab it now. If not, check the label on the side of the seat. That label is your best friend.
Before You Install: Do These Checks First
This part feels boring. I know.
But it saves you 20 minutes of re-installing later.
1) Confirm Which Mode Your Child Should Be In
Most kids should be rear-facing for as long as possible. That’s not an opinion. That’s crash physics.
Here’s the simple breakdown:
- Rear-facing: babies + toddlers (usually the longest stage)
- Forward-facing: older toddlers/kids once they outgrow rear-facing limits
Evenflo makes switching fairly straightforward. But don’t switch just because your child’s legs look bent. Kids are flexible. Your seat is not.
2) Pick the Best Seat Location
If your car allows it, the center seat is often considered safest because it’s farthest from side impact zones.
But there’s a catch.
Some center seats are too narrow. Some are oddly shaped and make the base unstable.
So here’s the practical answer:
Choose the spot where you can get the tightest, most correct install.
Usually, that’s one of the outboard seats.
3) Check Your Vehicle Manual (Yes, Really)
You’re looking for three things:
- Where your LATCH anchors are
- Whether your center seat has dedicated LATCH anchors
- How your seat belt locks for a car seat install
That last one matters more than people realize.
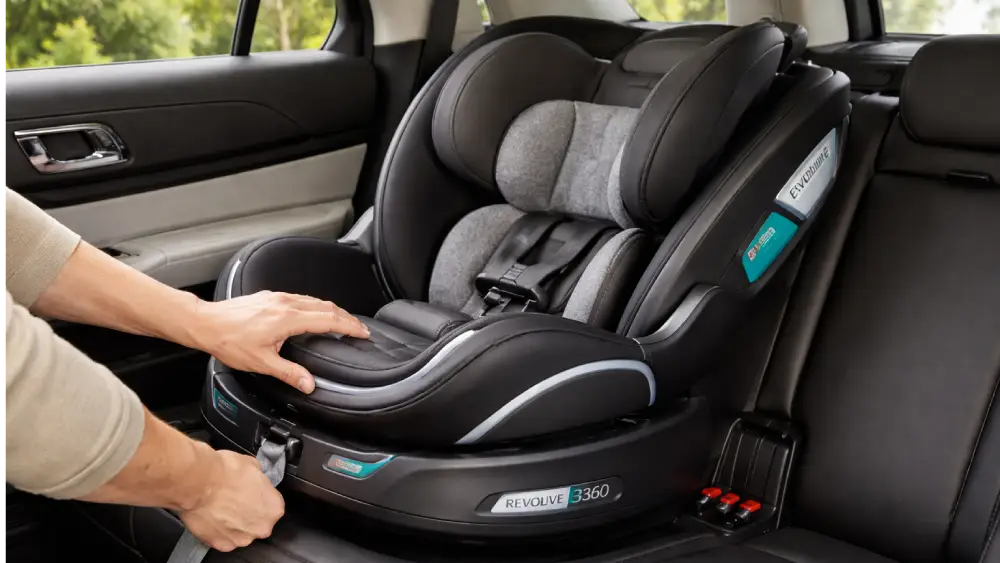
Understanding the Evenflo 360 Base and Rotation System
The Evenflo Revolve360 has two parts:
- The base (this is what you install)
- The rotating seat (this clicks into the base)
Here’s the key concept:
If the base is loose, the rotation feature doesn’t matter.
The rotation is for convenience. The base install is for safety.
Also, the rotation mechanism can make people assume it’s “self-locking.” It isn’t. You still have to tighten everything like a normal car seat.
Quick Setup Rules (The Ones That Prevent Mistakes)
Before we get into the step-by-step, keep these rules in mind:
- The base should not move more than 1 inch at the belt path.
- Recline indicators matter. A lot.
- Use either LATCH or seat belt. Not both (unless your manual says otherwise).
- Rear-facing does not use the top tether (in most setups).
- Forward-facing must use the top tether whenever possible.
Good. Now let’s install it.
Installing Evenflo 360 Rear-Facing Using LATCH (Step-by-Step)
This is the most common method. It’s also the easiest when your vehicle’s LATCH anchors are accessible.
If you want the clearest version of how-to install Evenflo car seat 360, start here.
Step 1: Place the Base on the Vehicle Seat
Set the base flat on the seat.
Don’t put the rotating seat on yet.
At this stage, you’re working with the base only.
Step 2: Set the Recline Angle
Look for the recline indicator on the side. Evenflo uses clear visual indicators.
Your goal: get it in the “safe” zone for rear-facing.
If your car seat is too upright for a baby, the baby’s head can slump forward. That’s a breathing risk.
If it’s too reclined, it can be unstable.
Step 3: Connect the LATCH Hooks
Locate the LATCH connectors.
Then connect them to the lower anchors in your vehicle seat. You should hear or feel a click.
Step 4: Tighten the LATCH Strap (The Real Work)
Here’s the move that actually works:
- Put one hand in the base.
- Press down and slightly back (toward the seatback).
- Pull the LATCH tightening strap straight.
You want tension. Real tension.
This is where most installs fail. People pull the strap without compressing the seat cushion, and it never gets tight enough.
Step 5: Do the “1-Inch Test”
Grab the base at the belt path area and tug side-to-side.
If it moves more than 1 inch, it’s not tight enough.
And no, wiggling at the top of the seat doesn’t count. Car seats move up there. That’s normal.
You test movement at the belt path only.
Step 6: Click the Seat Into the Base
Now attach the rotating seat. You should hear a solid click.
Give it a gentle tug upward to confirm it’s locked.
Step 7: Test Rotation and Lock Position
Rotate the seat.
Then return it to the driving position and confirm it locks.
You want smooth rotation. But you also want a secure lock when it’s facing forward in the car.
Installing Evenflo 360 Rear-Facing Using the Seat Belt (Step-by-Step)
Sometimes your child is approaching the weight limit for LATCH use. Sometimes your LATCH anchors are hidden in a seat crease like they’re playing hide-and-seek.
Seat belt installation is not “second best.”
It’s often just as safe when done correctly.
Here’s the cleanest method for how-to install Evenflo car seat 360 with a seat belt.
Step 1: Route the Seat Belt Through the Rear-Facing Belt Path
The rear-facing belt path is clearly labeled on the base.
Thread the seat belt through exactly as shown.
Step 2: Buckle the Seat Belt
Simple.
But don’t twist the belt.
Step 3: Lock the Seat Belt
This is where many installs go wrong.
Most vehicles lock in one of these ways:
- Switchable retractor: pull the shoulder belt all the way out, then let it retract (it clicks)
- Locking latchplate: the belt locks at the buckle when tightened
If you don’t lock the belt, the base can loosen over time. Especially after a few drives.
Step 4: Remove Slack While Pressing Down
Press down into the base.
Pull the shoulder belt to remove slack.
Then feed the slack back into the retractor.
Step 5: Test for Tightness (Again: 1 Inch Rule)
Same rule.
Same test.
If it moves more than 1 inch at the belt path, tighten more.
Step 6: Confirm Recline Indicator
Seat belt installs sometimes shift the angle slightly. Double-check.
Step 7: Attach the Seat and Confirm Rotation Lock
Click the seat onto the base.
Rotate it.
Return it to the locked driving position.
LATCH vs Seat Belt: Which One Should You Use?
This question comes up constantly. And it’s fair.
Here’s a quick comparison table that makes the decision easy:
| Installation Method | Best For | Common Problem | How to Avoid It |
| LATCH | Fast installs, accessible anchors | Not tight enough | Press down while tightening |
| Seat Belt | Strong install, great for heavier kids | Forgetting to lock belt | Learn your car’s locking method |
| Either One | Most families | Base still wiggles | Tighten again, test at belt path |
Both are safe.
The best one is the one you can install correctly every time.
Switching to Forward-Facing Installation
Eventually, your child will outgrow rear-facing limits.
This is where people get nervous. And honestly, I get it. Forward-facing comes with more rules, and the top tether becomes critical.
But the Evenflo 360 system makes switching easier than many seats.
When Should You Switch?
Use your Evenflo manual for exact numbers.
But here’s the guiding principle:
Keep your child rear-facing until they hit the maximum rear-facing height or weight limit.
Not when they look “too big.”
Not when grandma says it’s time.
When they actually outgrow the limits.
Forward-Facing Setup Notes
When you switch to forward-facing:
- Recline settings may change
- Belt path changes
- Top tether becomes part of the install
The rotation feature is still there. And yes, it still helps a lot with loading.
Installing Evenflo 360 Forward-Facing (LATCH or Seat Belt)
The steps are similar to rear-facing, but with two major differences:
- You use the forward-facing belt path
- You add the top tether
Forward-Facing Install Checklist
- Place base
- Set correct recline
- Use LATCH or seat belt
- Tighten until under 1 inch of movement
- Attach seat
- Attach and tighten top tether
That’s it.
But the tether deserves its own section.
How to Install the Top Tether (Forward-Facing Only)
If there’s one part of forward-facing installs that people skip, it’s the tether.
Sometimes they skip it because they can’t find the anchor.
Sometimes they skip it because it feels optional.
It is not optional in practice.
The tether reduces forward head movement in a crash. That’s huge.
Where to Find the Tether Anchor
Depending on your vehicle, the tether anchor may be:
- Behind the seat on the back shelf (sedans)
- On the back of the seat (some SUVs)
- On the floor behind the seat (some vans)
- In the cargo area behind the third row
Your vehicle manual will show the exact location.
How to Attach It Correctly
- Hook tether strap to the correct anchor
- Pull strap to tighten until snug
- Do not over-tighten to the point it lifts the base
Common Tether Mistakes
- Hooking to a cargo hook instead of a tether anchor
- Leaving slack in the strap
- Twisting the strap
- Forgetting it completely
If you’re trying to master how-to install Evenflo car seat 360, the tether is a non-negotiable skill.
How to Confirm Your Evenflo 360 Is Installed Correctly
This is the part that separates “looks installed” from “is installed.”
Here’s my favorite method. It’s simple. It works.
The 3-Check System
1) Tightness Test
Grab the base at the belt path.
Pull side-to-side and front-to-back.
Under 1 inch of movement is the goal.
2) Recline Indicator Check
Confirm the recline indicator is in the safe zone for your mode.
Rear-facing and forward-facing can be different.
3) Rotation Lock Check
Rotate the seat.
Return it to the driving position.
Make sure it locks and does not free-spin.
The Most Common Evenflo 360 Installation Mistakes (And How to Fix Them)
Let’s get blunt.
Most car seat mistakes aren’t dramatic. They’re small. And that’s why they’re dangerous.
Here are the big ones I see over and over:
Mistake 1: “It Clicked, So It’s Installed”
Clicking means connected.
It does not mean tight.
Fix: tighten again and do the 1-inch test.
Mistake 2: Testing Movement in the Wrong Spot
People grab the top of the seat and panic because it moves.
Fix: test at the belt path only.
Mistake 3: Seat Belt Not Locked
This is the classic seat belt install failure.
Fix: learn your vehicle’s locking method and confirm it’s locked before you finish.
Mistake 4: Wrong Belt Path
Evenflo seats have different belt paths for rear-facing and forward-facing.
Fix: double-check labels on the base.
Mistake 5: Buckle Crunch
Sometimes the buckle ends up inside the belt path area, making tightening impossible.
Fix: try a different seating position or adjust buckle positioning if your vehicle allows it.
Troubleshooting: What If Something Feels Off?
This section is where you’ll probably nod your head.
Because these issues are common.
Problem: “The Base Won’t Tighten Enough”
Try this:
- Press down harder while tightening
- Pull the strap or belt straight, not sideways
- Move the base slightly so it sits better in the seat contour
Problem: “The Seat Rotates But Feels Wobbly”
That usually means:
- Base is loose
- Seat isn’t fully clicked in
Fix:
- Re-check base tightness
- Remove and re-click seat onto base
Problem: “Recline Indicator Won’t Reach the Safe Zone”
Try:
- Reposition base
- Use the allowed recline adjustment (not towels or pool noodles unless manual allows)
Problem: “LATCH Anchors Are Impossible to Reach”
This is real. Some vehicles bury them.
Fix:
- Use seat belt installation instead
- Or use a seat gap tool if appropriate (but don’t force hardware)
A Quick Evenflo 360 Installation Checklist (Screenshot This)
Here’s a clean checklist you can run through in 30 seconds:
- Correct mode (rear-facing or forward-facing)
- Correct recline indicator zone
- LATCH or seat belt (not both)
- Belt path correct
- Belt locked (if using seat belt)
- Base movement under 1 inch at belt path
- Seat clicked into base securely
- Rotation works + locks in driving position
- Top tether attached and tightened (forward-facing)
Final Thoughts: Get Help If You Want the “Zero Doubt” Install
Installing the Revolve360 isn’t hard.
But it’s specific.
And once you understand the system, it becomes one of the most convenient seats to use daily. The rotation feature is genuinely helpful. It saves your back. It makes loading smoother.
Most importantly, once you truly learn how-to install Evenflo car seat 360, you’ll be able to reinstall it confidently after travel, cleaning, or switching vehicles.
If you want extra peace of mind, I strongly recommend getting the install checked by a certified CPST (Child Passenger Safety Technician). It’s one of those rare services that’s actually worth the time.
Because when it comes to car seats, “pretty sure” is not the goal.
Safe. Tight. Locked. Done.
And yes — now you genuinely know how-to install Evenflo car seat 360 like a pro.
Frequently Asked Questions
Most installs take 10–20 minutes the first time, and 5–10 minutes once you’ve done it before.
Either method is safe when installed correctly, but seat belt installs are often better once your child gets heavier.
No—unless your Evenflo manual specifically says it’s allowed for your exact model and mode.
The base should move less than 1 inch when pulled at the belt path, side-to-side and front-to-back.
You may be testing movement in the wrong spot—only check at the belt path, not the top of the seat.
Yes, if your vehicle requires it—locking prevents the base from loosening over time.
Switch only when your child reaches the maximum rear-facing height or weight limit listed on the seat label.
Attach it to your vehicle’s tether anchor (not a cargo hook), usually behind the seat or in the cargo area.
A very tight install or seat positioning can affect rotation slightly, but the seat should still rotate smoothly and lock firmly.
Sometimes, yes—but only if your vehicle allows it and you can achieve a stable, tight install.