Fitting a car seat shouldn’t feel intimidating — but it often does. If you’re here to learn how to fit a Joie 360 car seat, you’re already doing the most important thing: taking safety seriously. And that matters. Because even the best car seat in the world won’t protect a child if it’s installed incorrectly.
I’ve seen brand-new seats wobbling. Support legs floating above the floor. ISOFIX connectors half-clicked in. Small mistakes. Big consequences.
The good news? Installing a Joie 360 seat is straightforward when you understand the sequence. This guide walks you through it clearly, practically, and without fluff. Whether you’re fitting it for the first time or reinstalling after cleaning, you’ll know exactly what to do.
Let’s get into it.
Understanding Your Joie 360 Car Seat
Before we talk about how to fit a Joie 360 car seat, you need to understand what makes it different.
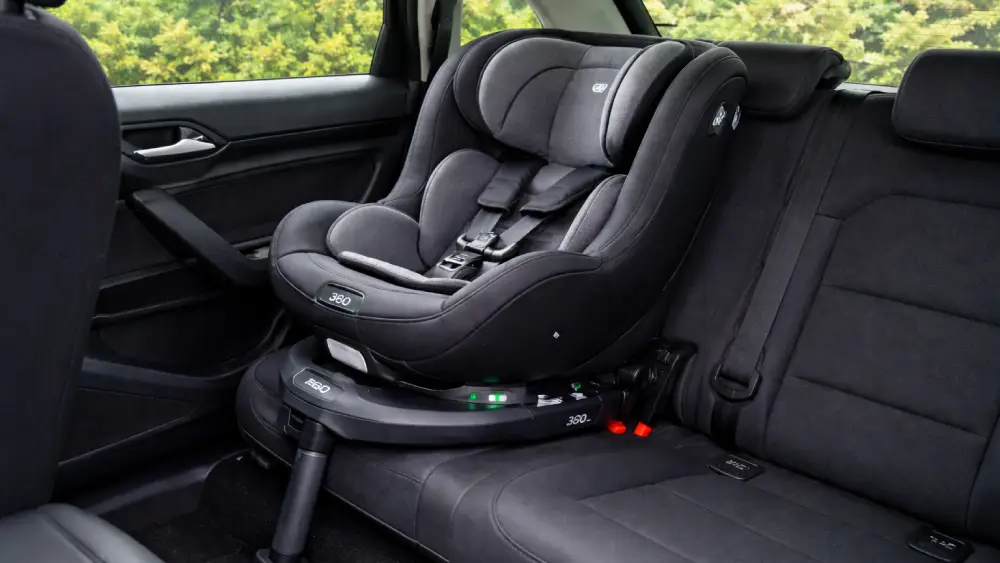
The defining feature is rotation. The seat spins 360 degrees, allowing you to turn it toward the car door when placing your child inside. That’s not just convenient — it reduces awkward lifting and improves harness positioning. A small ergonomic win. A big daily difference.
Most Joie 360 models use ISOFIX connectors and a support leg instead of a seatbelt installation. That’s important. ISOFIX provides a rigid connection to the vehicle chassis, which reduces installation errors.
Common Joie 360 Models
While installation is similar across models, always check your manual for exact limits:
| Model | Rotation | Rear-Facing | Forward-Facing | ISOFIX |
| Spin 360 | Yes | Yes | Yes | Yes |
| i-Spin 360 | Yes | Yes | Yes | Yes |
| i-Spin Safe | Yes | Extended rear-facing | No (rear only) | Yes |
Weight and height limits differ. Some allow extended rear-facing up to 18kg or beyond. Others transition earlier. Know yours.
Before You Start: Critical Safety Checks
Installation begins before the seat even touches the car.
Slow down. Check three things.
1. Confirm ISOFIX Availability
Look between your vehicle’s rear seat cushions. You should see two small metal anchor bars. If you don’t see them, check your car manual — they may be slightly recessed.
No ISOFIX? A Joie 360 may not be compatible.
2. Check the Vehicle Floor
The support leg must rest firmly on the vehicle floor. No storage compartments underneath unless your car manufacturer specifically allows it with an approved insert.
A floating support leg defeats its purpose.
3. Choose the Right Seat Position
The safest place is usually the rear seat. Middle seats can be ideal if ISOFIX anchors are present — but many vehicles only provide anchors on side seats.
Never install in front of an active airbag.
Clear the seat area. Remove mats or debris. Adjust the vehicle seat back to an upright position.
Now you’re ready to fit it.
How to Fit a Joie 360 Car Seat Rear-Facing
Rear-facing is the safest position for young children. It distributes crash forces across the entire back of the seat instead of concentrating them at the neck.
Here’s exactly how to fit a Joie 360 car seat in rear-facing mode.
Step 1: Extend the ISOFIX Connectors
Locate the ISOFIX release button at the front or side of the base.
Press and pull.
Extend both connectors fully until they lock into position. You want maximum reach before guiding them toward the anchor bars.
Step 2: Attach to ISOFIX Anchors
Align the connectors with the metal bars in your car seat.
Push firmly.
You should hear a distinct click on each side. Most Joie 360 models have indicator windows that turn green when properly locked. Red means not secure.
Don’t guess. Look.
If one side doesn’t click:
- Pull the seat out.
- Re-align.
- Push evenly with both hands.
Step 3: Push the Seat Back
Once both connectors are locked, press the car seat base firmly toward the vehicle seat back.
It should sit flush. No gap.
Some Joie models have an adjustment lever that allows you to slide the base tighter toward the backrest. Use it.
Step 4: Deploy the Support Leg
Now lower the support leg until it touches the floor.
Press the adjustment button and extend it downward until it sits firmly. You should see a green indicator once it makes solid contact.
The leg must:
- Sit flat
- Be vertical
- Not hover
- Not rest on a storage lid unless approved
This is non-negotiable.
Step 5: Set the Recline Angle
Infants require more recline to keep airways open. Older babies can sit more upright.
Check the recline indicator on the side of the seat. Many Joie models include a bubble or color guide.
If unsure, err slightly more reclined for younger infants.
Step 6: Secure Your Child Properly
Installation isn’t finished until the harness is correct.
Adjust the headrest so the harness slots are level with or slightly below your child’s shoulders (rear-facing).
Tighten until you cannot pinch excess strap at the shoulder. This is called the pinch test.
Straps should be flat. No twists. Chest clip (if included) at armpit level.
Done properly, rear-facing installation takes about 5–8 minutes.
The 1-Inch Test
After fitting, grab the base — not the rotating seat — and try to move it side to side.
It should not move more than one inch at the belt path.
Some slight movement at the top of the seat is normal. The base should feel anchored.
If it slides? Reinstall. Start over if necessary. Precision matters.
How to Switch to Forward-Facing Mode
Parents often ask when they can turn the seat forward. Legally permitted does not mean safest.
Rear-facing provides superior protection. Keep children rear-facing as long as your specific Joie 360 model allows within height and weight limits.
When you’re ready to switch:
- Rotate the seat forward.
- Confirm ISOFIX remains locked (green indicators visible).
- Ensure the support leg is still firmly grounded.
- Adjust recline to an approved forward-facing setting.
- Raise harness height so straps are level with or just above shoulders.
The installation method itself doesn’t change significantly — ISOFIX and support leg remain engaged. That consistency is one reason parents choose this design.
Common Installation Mistakes to Avoid
Even experienced parents make small errors. Here are the most frequent ones I see when explaining how to fit a Joie 360 car seat:
- ISOFIX connectors not fully extended before attachment
- Ignoring red indicator windows
- Support leg resting on a storage lid
- Harness too loose
- Seat installed while vehicle seat is reclined
- Not pushing the base firmly against the seat back
These are easy to fix. But only if you check.
Quick Installation Checklist
Use this as a final review:
- ISOFIX connectors clicked and green
- Base pushed flush against vehicle seat
- Support leg vertical and green indicator visible
- Recline angle appropriate
- Harness snug and untwisted
- Movement less than one inch
Print it. Save it. Use it every time you reinstall.
Troubleshooting Installation Problems
Sometimes the seat just won’t cooperate. Here’s how to solve common issues.
Seat Won’t Click into ISOFIX
Check alignment. ISOFIX bars can sit deeper than expected.
Try:
- Pressing vehicle seat cushion down slightly
- Guiding one connector at a time
- Ensuring connectors are fully extended
Support Leg Too Short
First, make sure you’ve adjusted the vehicle seat upright.
If there’s a floor compartment:
- Consult your vehicle manual
- Use approved filler blocks if permitted
Never leave the leg unsupported.
Seat Feels Loose
Remove it completely.
Yes, completely.
Reinstall from scratch rather than adjusting a half-secure setup. Partial fixes often leave hidden errors.
Ongoing Safety Checks
Installation is not a one-time task.
Check the seat:
- Once a month
- After long trips
- After removing it for cleaning
- After any accident, even minor
ISOFIX systems are reliable, but vibration and daily use can cause small shifts.
A 30-second check gives peace of mind.
Why Correct Installation Matters
Understanding how to fit a Joie 360 car seat correctly is about more than compliance. It’s about physics.
In a collision, forces multiply instantly. A secure ISOFIX connection transfers energy into the vehicle frame. The support leg reduces forward rotation. The harness distributes force across strong parts of a child’s body.
Each component works together.
If one part is wrong, the system weakens.
That’s why precision matters. Not perfection — precision.
Final Thoughts
Learning how to fit a Joie 360 car seat isn’t complicated. It just requires intention. Extend the ISOFIX. Listen for the clicks. Check the indicators. Lower the support leg firmly. Tighten the harness properly.
Simple steps. Done carefully.
I always recommend installing it once without your child present so you can focus. Take your time. Test it. Adjust it. Then test it again.
Because when it comes to child safety, confidence should come from evidence — not assumption.
Fit it correctly. Check it regularly. Drive knowing you did it right.
Frequently Asked Questions
Most first-time installations take 10–15 minutes, but once familiar, you can fit it in under 5 minutes.
No, Joie 360 models are designed for ISOFIX installation and should not be installed using a seatbelt.
Check for an audible click and confirm the indicator windows show green on both sides.
Yes, the support leg must rest firmly and vertically on the vehicle floor with a green indicator visible.
Switch only when your child reaches the model’s height or weight limit, and keep them rear-facing as long as possible for safety.
A small amount of movement at the top is normal, but the base should not move more than one inch side to side.
Not always, but if you do remove it, reinstall carefully and repeat all safety checks.
Only if absolutely necessary and with the airbag fully deactivated; rear seats are strongly recommended.
Inspect it monthly and after long trips, cleaning, or any minor collision.
It’s not required, but a professional check can provide added reassurance, especially for first-time parents.