If you’re searching for how to adjust straps on Joie car seat 360, you’re already doing the right thing. Proper harness adjustment is one of the most important factors in child car seat safety, yet it’s also one of the most misunderstood. I’ve seen perfectly installed seats rendered less effective simply because the straps were too loose, too low, or subtly twisted. The Joie 360 series is engineered for safety and convenience, but even the best design only works when it’s adjusted correctly.
In this guide, I’ll walk you step by step through how to adjust straps on Joie car seat 360 models safely and confidently. We’ll cover shoulder straps, headrest positioning, crotch buckle placement, troubleshooting, and the most common mistakes parents make. Let’s get into it.
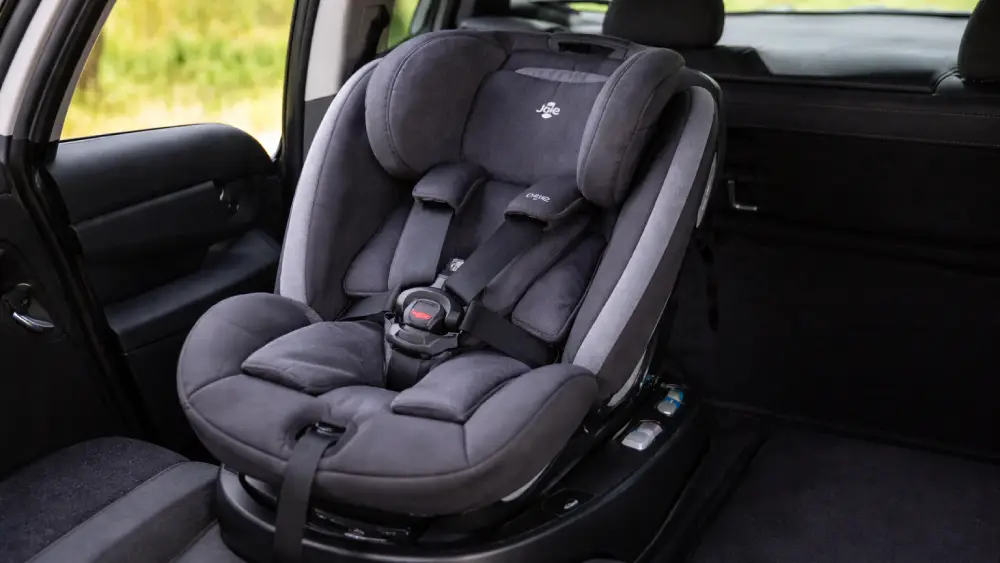
Understanding the Joie 360 Harness System
Before adjusting anything, it helps to understand what you’re working with.
The Joie 360 uses a five-point harness system. That means two shoulder straps, two hip straps, and a buckle between the legs. When tightened correctly, the harness distributes crash forces across the strongest parts of a child’s body. It’s simple in concept, but precision matters.
Most Joie 360 models also use a no-rethread harness system. This is important. Instead of manually re-threading straps through different slots as your child grows, adjusting the headrest automatically moves the shoulder straps with it. That design makes learning how to adjust straps on Joie car seat 360 much easier than older car seats.
And then there’s the rotation feature. The 360-degree swivel isn’t just convenient for loading your child—it makes adjustments significantly easier. I always rotate the seat toward me before making changes. It improves visibility and reduces awkward angles.
Just remember: rotate for access, lock before driving. Always.
When Should You Adjust the Straps?
Parents often wait too long to make adjustments. Growth happens fast.
You should review harness fit when:
- Your child has grown taller or gained noticeable weight
- You switch between seasonal clothing
- You’ve washed or reinstalled the seat cover
- The harness feels difficult to buckle
- You notice slack in the straps
Even small changes in height can affect shoulder strap positioning. If you’re unsure whether it’s time, check shoulder level and perform a pinch test. That quick check prevents major safety issues.
Step-by-Step: How to Adjust Straps on Joie Car Seat 360
Here’s the part you came for. I’ll break this down clearly and practically.
Step 1: Rotate the Seat Toward You
Unlock the swivel mechanism and turn the seat to face you. This gives you full access to the harness system.
Working from the side is frustrating. Facing the seat directly makes everything easier.
Step 2: Loosen the Harness Completely
At the front base of the seat, you’ll find the harness adjustment button. It’s usually beneath a fabric flap.
Press the button down firmly while pulling both shoulder straps forward. Don’t tug one at a time. Pull them evenly to prevent uneven tension.
Create enough slack so your child can sit comfortably while you reposition everything.
Step 3: Adjust the Headrest Height
This is where many parents get confused.
To properly understand how to adjust straps on Joie car seat 360, you need to know that the shoulder strap height changes when you move the headrest. Locate the headrest adjustment lever, usually at the top or back of the seat. Squeeze or lift it, then slide the headrest up or down.
Now check positioning:
- Rear-facing: Straps should sit at or just below shoulder level.
- Forward-facing: Straps should sit at or just above shoulder level.
If straps are too low in forward-facing mode, crash forces can compress downward. Too high in rear-facing reduces support. The alignment matters more than most people realize.
Step 4: Seat the Child Properly
Before tightening, make sure your child’s body position is correct.
Their back should be flat against the seat.
Their bottom should be fully back.
No bulky jackets or puffy winter coats.
Heavy clothing creates artificial slack. It might look snug, but in a crash, the padding compresses instantly. I always recommend thin layers under the harness and blankets over the top instead.
Step 5: Buckle and Tighten
Insert the crotch buckle and click both shoulder connectors into place. Then slide the chest clip up temporarily.
Pull the front adjustment strap in one smooth motion. You’ll feel the harness tighten evenly across both sides.
Now perform the pinch test. Try to pinch the strap at your child’s shoulder. If you can grab excess webbing, it’s too loose. If your fingers slide off and can’t pinch fabric, you’re good.
Slide the chest clip to armpit level. Not stomach level. Not neck level. Armpits.
That’s the correct fit.
Adjusting the Crotch Buckle Position
As your child grows, the crotch buckle may need repositioning. Most Joie 360 models offer two or three slot positions.
To adjust:
- Rotate the seat for access.
- Remove the seat pad if necessary.
- Turn the buckle anchor sideways beneath the seat.
- Push it up through the current slot.
- Reinsert it through the next appropriate slot.
- Ensure it lies flat and secure underneath.
The buckle should be close to—but not pressing into—the child’s body. Too far away increases forward movement. Too tight causes discomfort and resistance to buckling.
This adjustment is often overlooked when learning how to adjust straps on Joie car seat 360, but it’s essential for proper harness geometry.
Fixing Twisted or Uneven Straps
Twisted straps reduce surface area and concentrate crash forces into narrow points. That’s not what we want.
If you notice twisting:
- Fully loosen the harness.
- Unbuckle everything.
- Pull straps forward completely.
- Trace each strap from chest clip to back slot.
- Straighten manually before tightening again.
Never ignore a twist because “it’s minor.” It takes seconds to fix and dramatically improves safety.
If one strap feels tighter than the other, check for hidden folds behind the seat padding. Uneven tightening usually means something is snagged internally.
Rear-Facing vs Forward-Facing Adjustments
Mode changes require careful reassessment.
Here’s a quick reference:
| Position | Strap Height Rule | Tightness Priority |
| Rear-Facing | At or just below shoulders | Extremely snug |
| Forward-Facing | At or just above shoulders | Snug with pinch test |
Rear-facing positioning supports the head, neck, and spine during frontal impacts. Forward-facing changes the crash dynamics entirely. Don’t assume the previous strap setting still works after switching modes.
Each time you transition, review how to adjust straps on Joie car seat 360 from scratch.
Safety Practices I Never Skip
Some habits are non-negotiable.
- I never adjust harness straps while the vehicle is moving.
- I check tightness before every trip.
- I recheck after cleaning the seat.
- I avoid aftermarket strap covers not approved by Joie.
- I confirm the swivel lock is engaged before driving.
Car seats are engineered systems. Small alterations can affect performance. Following manufacturer guidelines keeps the design integrity intact.
Common Mistakes to Avoid
Even attentive parents make these errors:
- Leaving straps too loose because the child “complains.”
- Positioning the chest clip too low.
- Forgetting to adjust the headrest as the child grows.
- Allowing bulky winter coats under the harness.
- Forgetting to lock the rotation feature.
The biggest mistake? Assuming once is enough. Harness adjustment is ongoing.
If you truly want to master how to adjust straps on Joie car seat 360, consistency matters more than perfection.
Troubleshooting Common Problems
Straps Won’t Tighten
Check for twisting first.
Then inspect the adjuster strap for obstruction.
Make sure your child is seated fully back—if they’re slouching forward, tightening becomes uneven.
Sometimes crumbs or debris can jam the mechanism. A quick inspection can solve what seems like a mechanical failure.
Headrest Won’t Move
Remove your child before adjusting.
Ensure no fabric is caught in the mechanism.
Check that the vehicle’s headrest isn’t pressing against the seat, limiting movement.
Resistance usually means something external is blocking motion.
Final Thoughts
Learning how to adjust straps on Joie car seat 360 isn’t complicated—but it demands attention. Small misalignments can compromise protection. A properly fitted harness, on the other hand, dramatically increases safety performance in a crash.
I encourage parents to treat strap adjustment as routine maintenance, not a one-time setup. Check it. Recheck it. Trust the pinch test. And never hesitate to consult your Joie manual for model-specific details.
The Joie 360 is designed to make safety easier. With the right adjustments, it does exactly that.
And once you’re confident in how to adjust straps on Joie car seat 360, you’ll buckle your child in with certainty every single time.
Frequently Asked Questions
The harness should pass the pinch test—you shouldn’t be able to pinch excess webbing at your child’s shoulder.
Check the harness fit before every trip and reassess fully whenever your child grows or changes clothing layers.
No, most Joie 360 models use a no-rethread system where adjusting the headrest automatically moves the straps.
The chest clip should sit at armpit level to keep the shoulder straps properly aligned.
Yes, you can adjust straps while installed, but always rotate and lock the seat properly before driving.
Check for twisted straps, debris in the adjuster mechanism, or uneven seating position before assuming a defect.
Yes, rear-facing straps should be at or just below shoulders, while forward-facing straps should be at or just above.
No, bulky coats create hidden slack; use thin layers and place blankets over the harness instead.
Move it when your child grows and the buckle sits too far forward or causes discomfort.
Follow the headrest-based adjustment system, use the pinch test consistently, and review the manual for your specific model.